Grant a role
You need Security administration. Choose a role for the actual task using Roles and grants; administrative roles do not automatically allow reading or editing data.
Open the grant dialog
Section titled “Open the grant dialog”- Open Settings › People and access › People or Groups, or Settings › Connections › Clients and open the recipient’s row. Choose Grant in their roles or access section. The recipient is already chosen.
- Alternatively, open Settings › Workspaces, select the workspace and choose Access, then Grant. Choose Who by searching for the person, group or client by name. Check the kind as well as the name before selecting them.
- For a client, choose Roles under What if you are granting management access. Consumer APIs is a separate kind of grant; see Create a client.
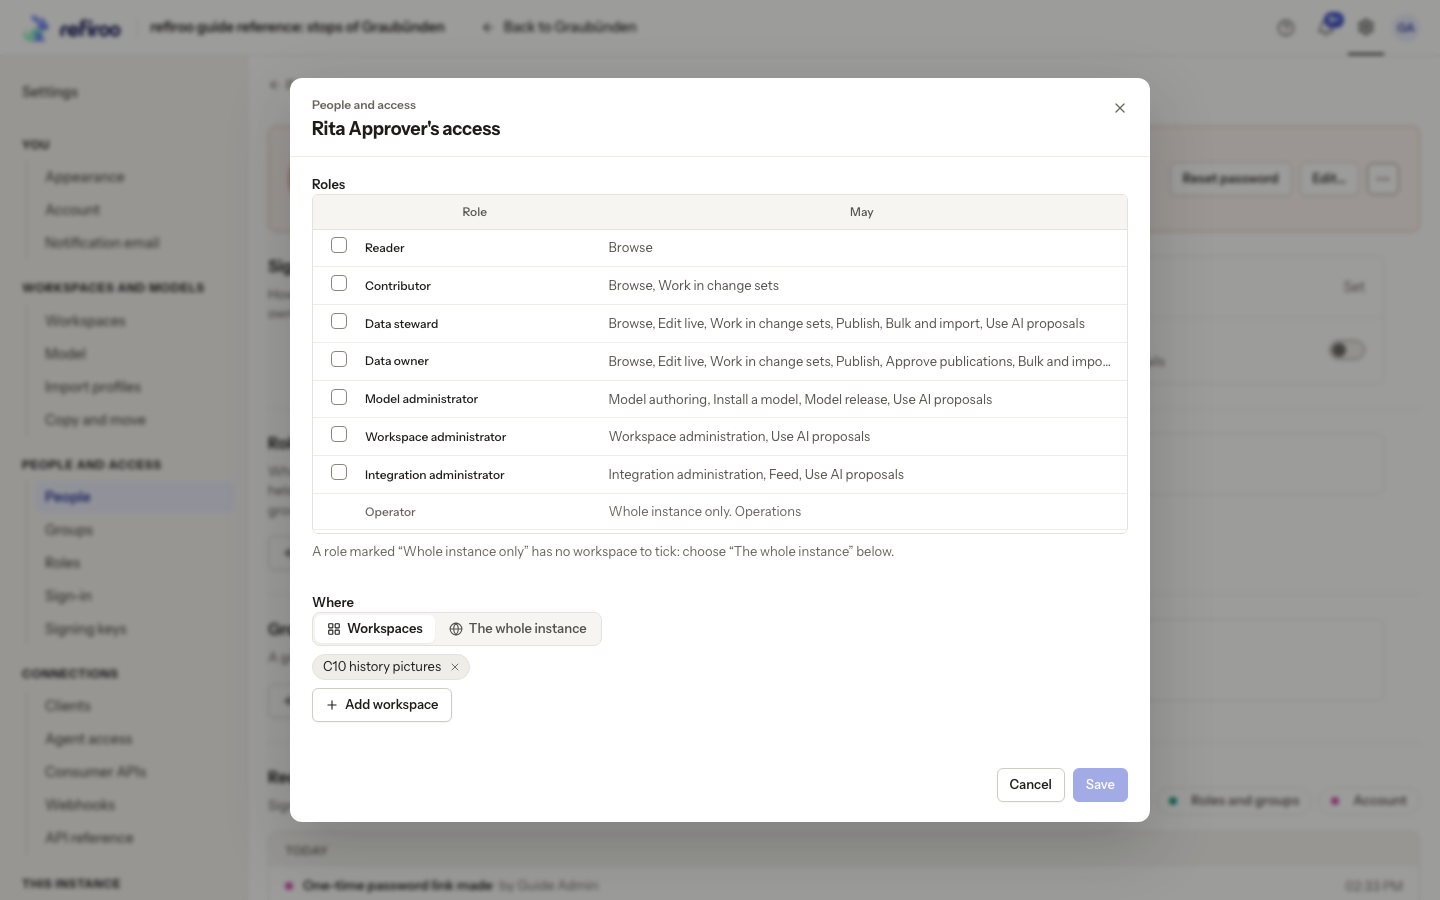
Above: the dialog for fictional Rita Approver has no role selected and is open but unsaved. Check the selected workspace’s displayed name rather than assuming the default is the one intended.
Choose what and where
Section titled “Choose what and where”- Tick the role or roles. Read May beside each role to check its action groups. More than one role adds those permissions together.
- Under Where, choose Workspaces and use Add workspace to select the intended workspaces. Remove any initially selected workspace that should not receive this grant.
- Choose The whole instance only for access that should apply to every workspace, including future workspaces. Roles greyed out for workspace grants require this reach.
- If one role is selected in one workspace and narrowing is offered, review Narrow what they may change. Keep Everything in … for all permitted writes there, or choose Only these applications and record types and add the intended entries. This never restricts reading. To narrow several grants, make them one role and workspace at a time.
- Read the summary in Grant access and choose Add grant, or Add N grants for several. Cancel before submitting makes no grants. Closing after some were saved does not undo those grants. If several grants are attempted and some fail, the dialog lists the failures and says whether the others were made. Successful grants remain. Failed choices stay selected with their reasons; correct them and use Try again.
Verify or remove access
Section titled “Verify or remove access”- Check the recipient’s table: Where, the role, any Narrowed to (writes) entries and Through. For a person, group membership can supply additional roles.
- Open the workspace’s Access tab to see the combined result. Use the search and Role or Kind filters to locate the recipient. Whole-instance grants are marked there.
- To remove a direct grant, choose its Remove and follow any confirmation shown. For an inherited role, change the group’s grant or the person’s membership at its source. Removing one grant does not cancel another grant that allows the same work.
- Ask the recipient to check the next action in that workspace. Changes apply on the next request. If they still have wider access, inspect direct grants, all groups and whole-instance grants before concluding removal failed.
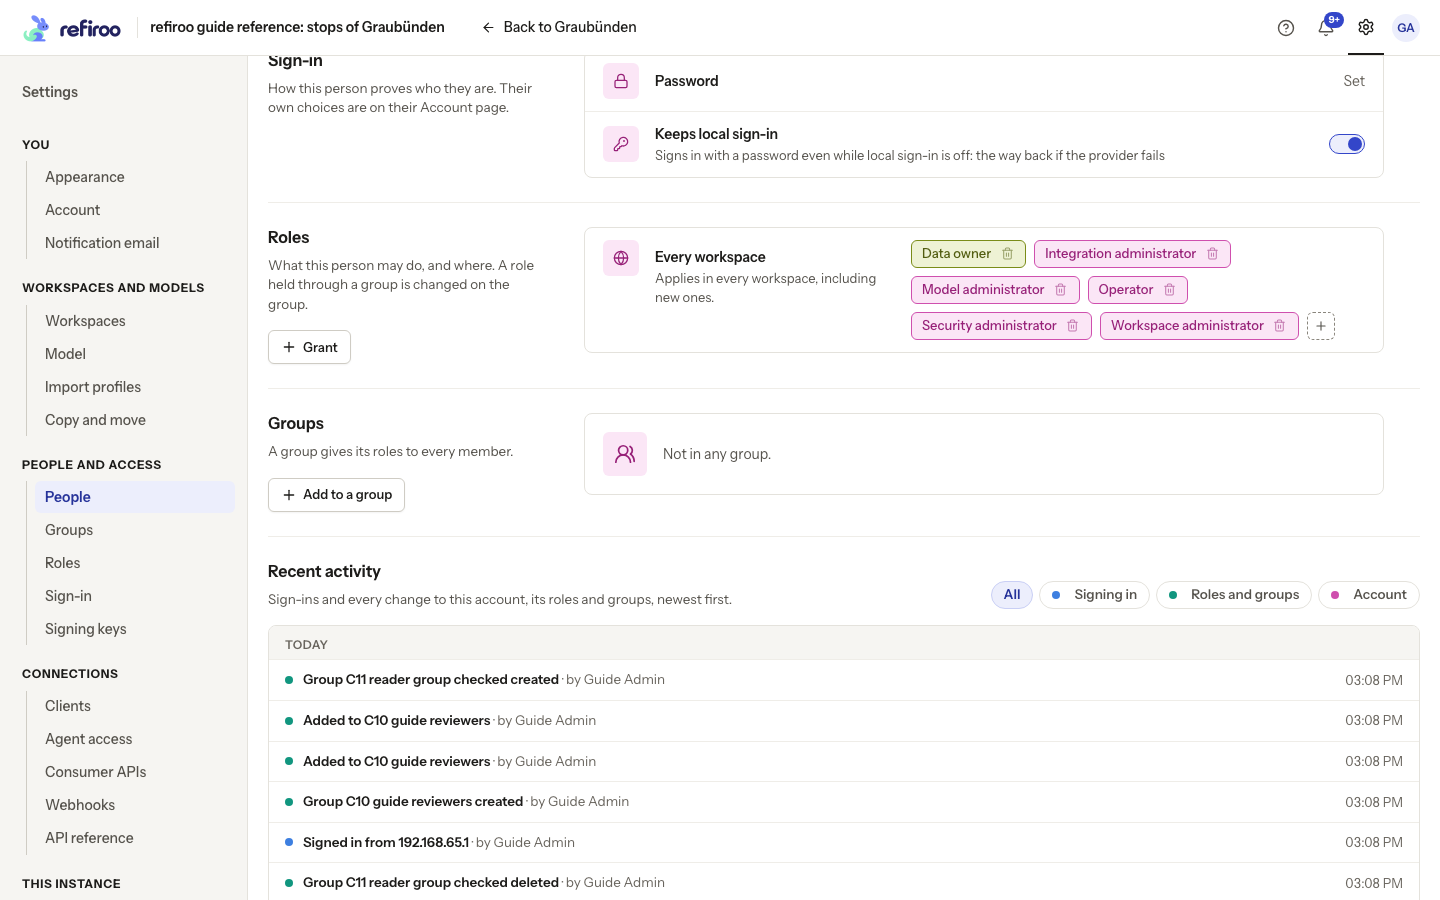
Above: Guide Admin’s six grants are direct. A group-supplied role would identify its source in Through.
The last active Security administrator cannot be removed. If a refusal says the recipient or grant changed meanwhile, reload and review the current state before choosing again.
For the complete narrowing task, follow Narrow a grant to record types. For clients reading a declared interface, use Grant a consumer API to a client instead of adding a management role.