Edit a record page
Arrange a type’s record page so people can read its fields and related records together. You need Model authoring and an open draft. These changes affect the draft; people see them after its release is activated in their workspace.
See Record pages and tables for the page a type gets before you arrange it.
Open the layout
Section titled “Open the layout”- In the model editor, select the type in its application and choose Preview.
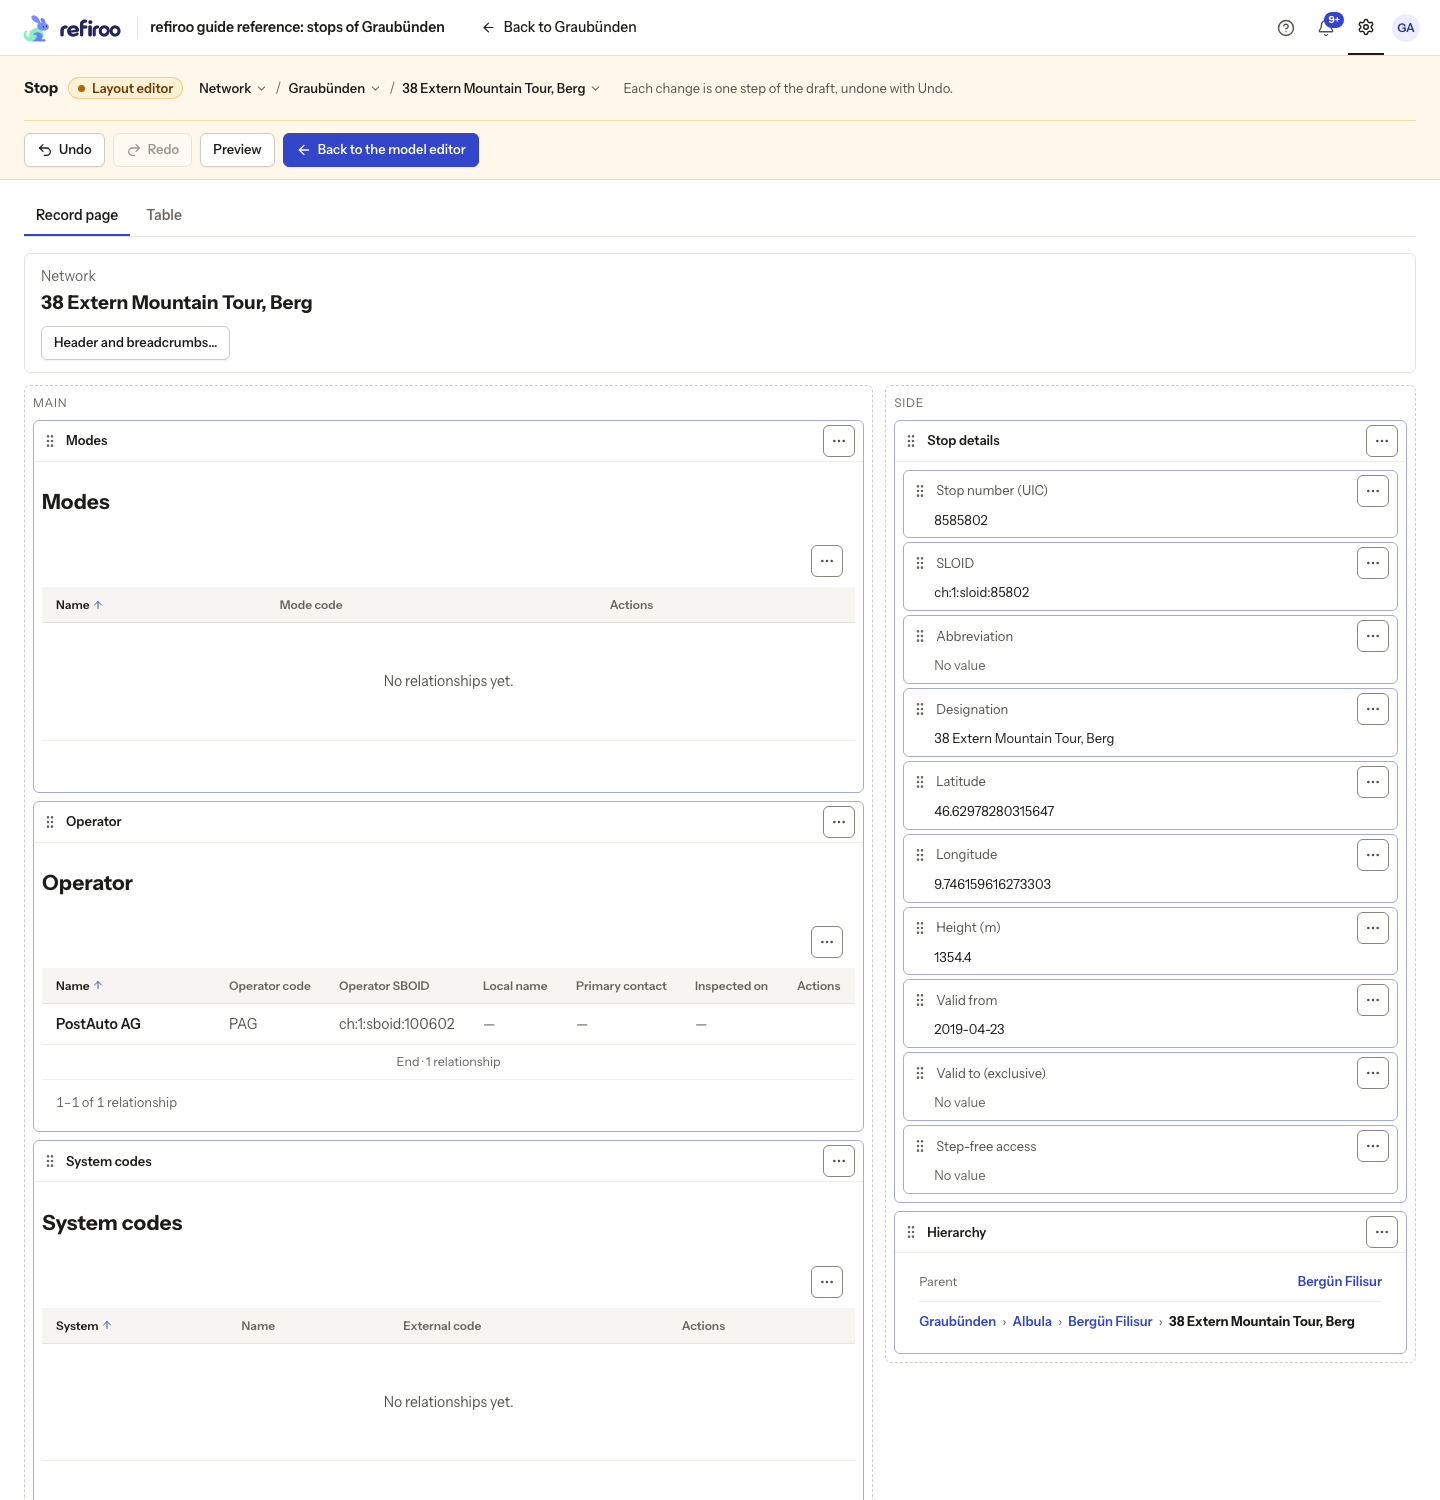
- Choose Edit layout, then Record page. The layout shows Main and Side regions with frames for panels and fields.
- If the type has no declared page, choose Declare its page first. This saves the generated page as a draft step so you can edit it. It includes Details, hierarchy where applicable, contained records and a panel for each relationship.
If the draft has errors, use Show issues and correct them before opening the layout. For help choosing a workspace and record, follow Preview a type.
Add a panel
Section titled “Add a panel”- At the foot of Main, choose Add panel…, beside New field group.
- In Add panel, choose What the panel shows:
- Related records lists the records reached through one relationship. It is offered when this type has relationships other than containment.
- Contained records lists records inside the open record. It is offered only when the type contains types that this application lists. Select at least one Contained types choice.
- Fields creates a group of this type’s fields. Select Fields; chosen fields move from their current groups into the new one.
- For Related records, select Relationship. The names read from this type’s side of the relationship, including relationships pointing towards it. (on the page) means an existing panel already lists that relationship; it does not prevent another panel. Read the Columns: line beneath the choice to see the columns the new panel gets.
- Choose Region: Main or Side. Review Title. For related or contained records, it starts from your choice and you can change it. For a field group, enter a title.
- Choose Add panel. The panel appears in the chosen region as one draft step. Use Undo if it was not what you wanted. Adding the panel does not create or change records.
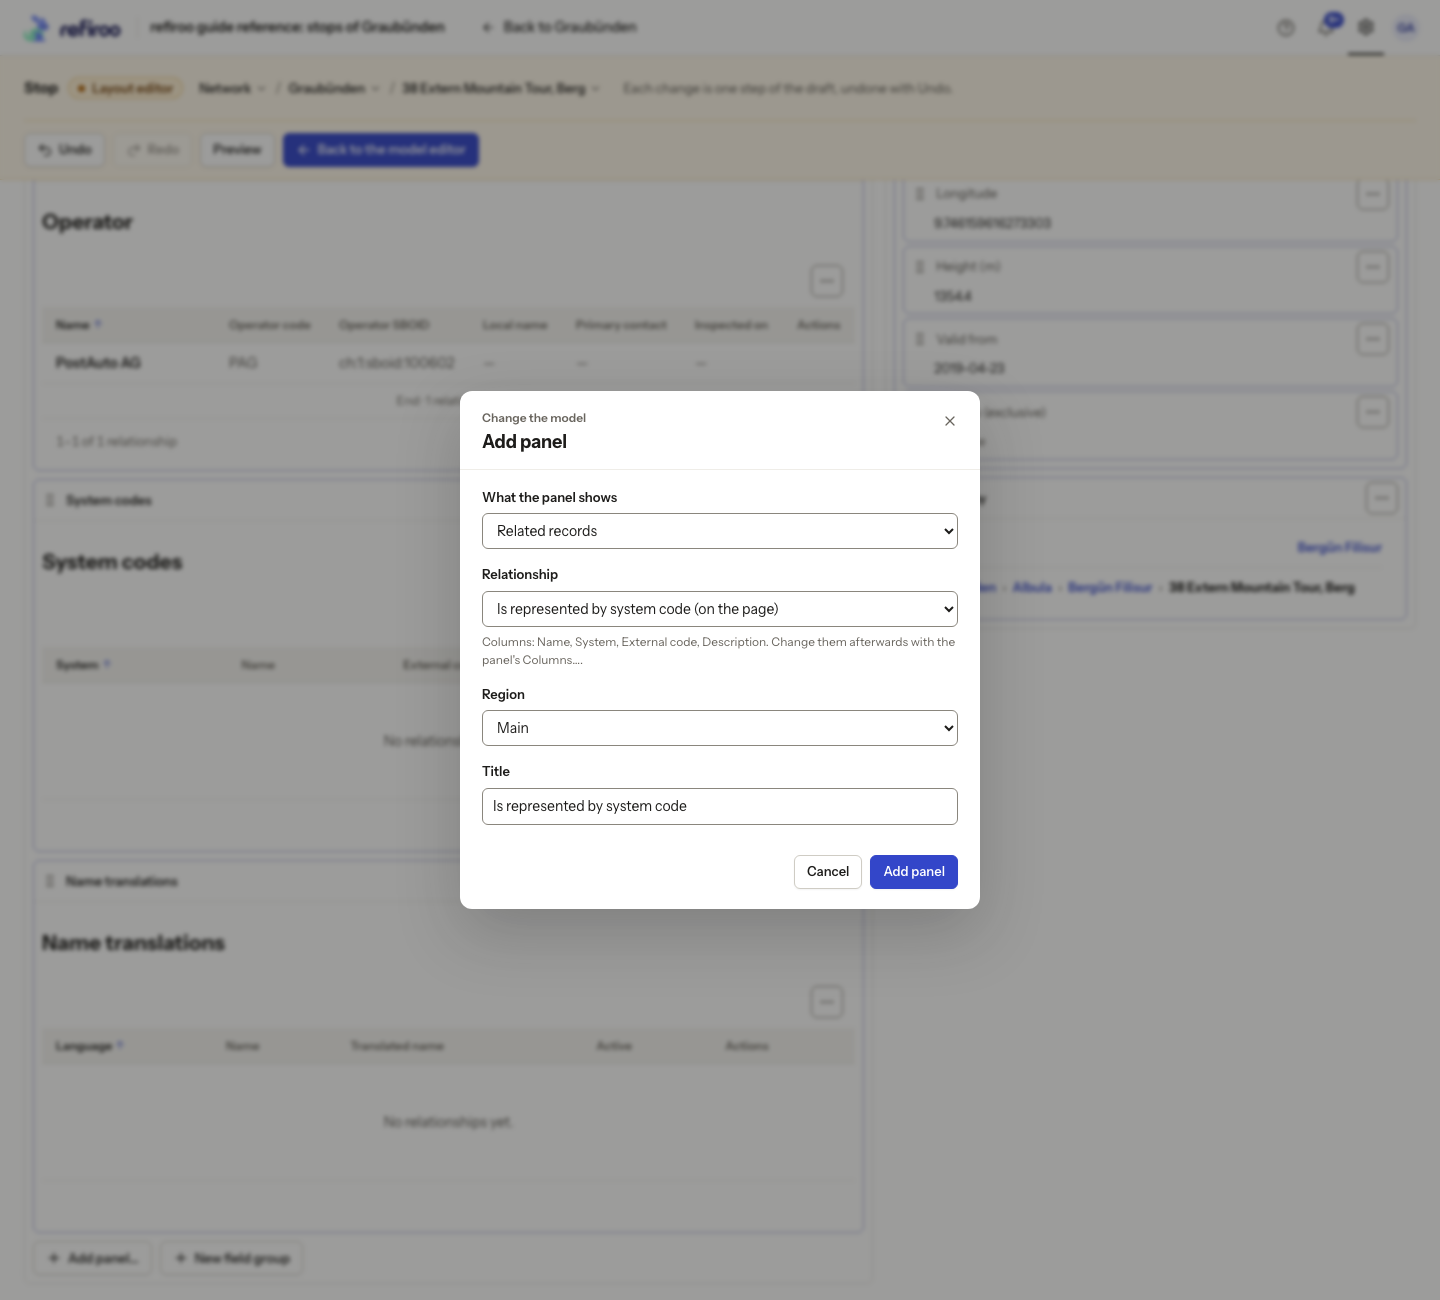
Above: a Stop page in the guide’s Graubünden model, with Is represented by system code chosen. The proposed columns include Name, System, External code and Description.
An existing page keeps its arrangement. To give an older page separate panels for its relationships, add each one here rather than expecting Declare its page to replace it.
Choose a panel’s columns and sort
Section titled “Choose a panel’s columns and sort”- Open the menu of a related-record, contained-record or table panel and choose Columns….
- Select Name and the fields you need. Under Where it sits, select a containing type to show the containing record’s name. This can be an ancestor further up the hierarchy, not just the immediate parent. Type is also offered when the panel lists several types.
- Choose Apply and inspect the column frames. Keep at least one column.
- On a related-record panel whose menu offers Sort…, choose it, select Sorted by and choose Save. The choices come from the panel’s allowed sort fields.
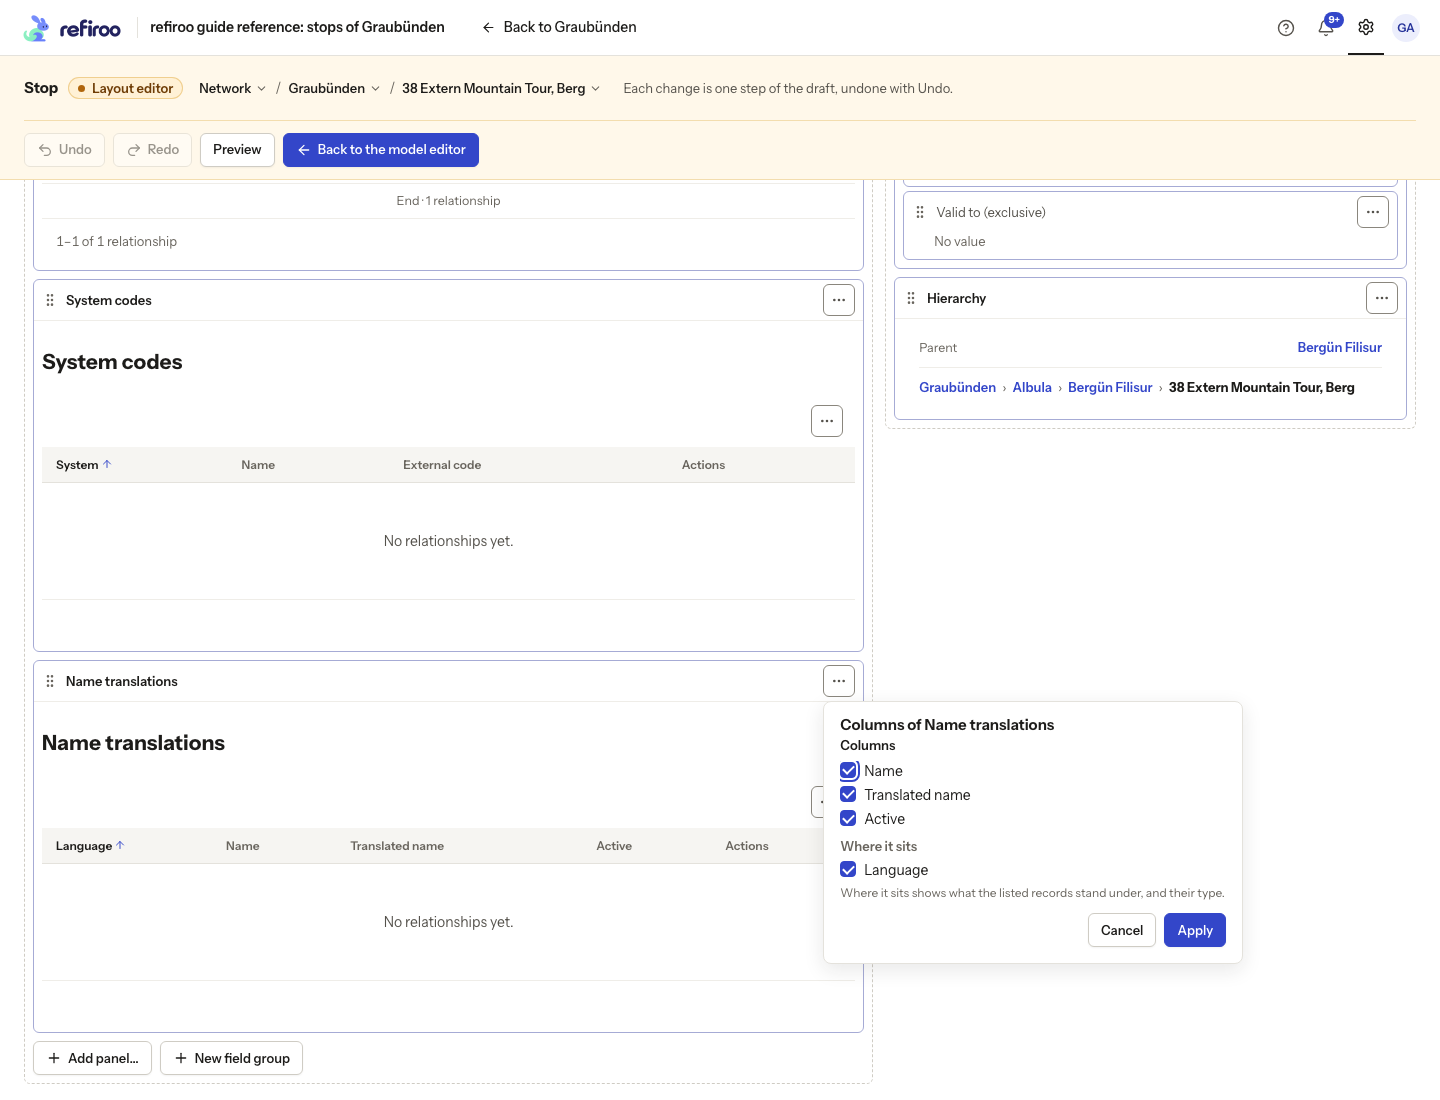
Above: the Name translations panel on a Stop page offers its own columns under Columns and Language under Where it sits. It shows each translation’s language name. To show a field of that language, such as Language code, use a table’s related-field columns instead. Fields stored on the relationship itself cannot be columns.
Arrange panels and fields
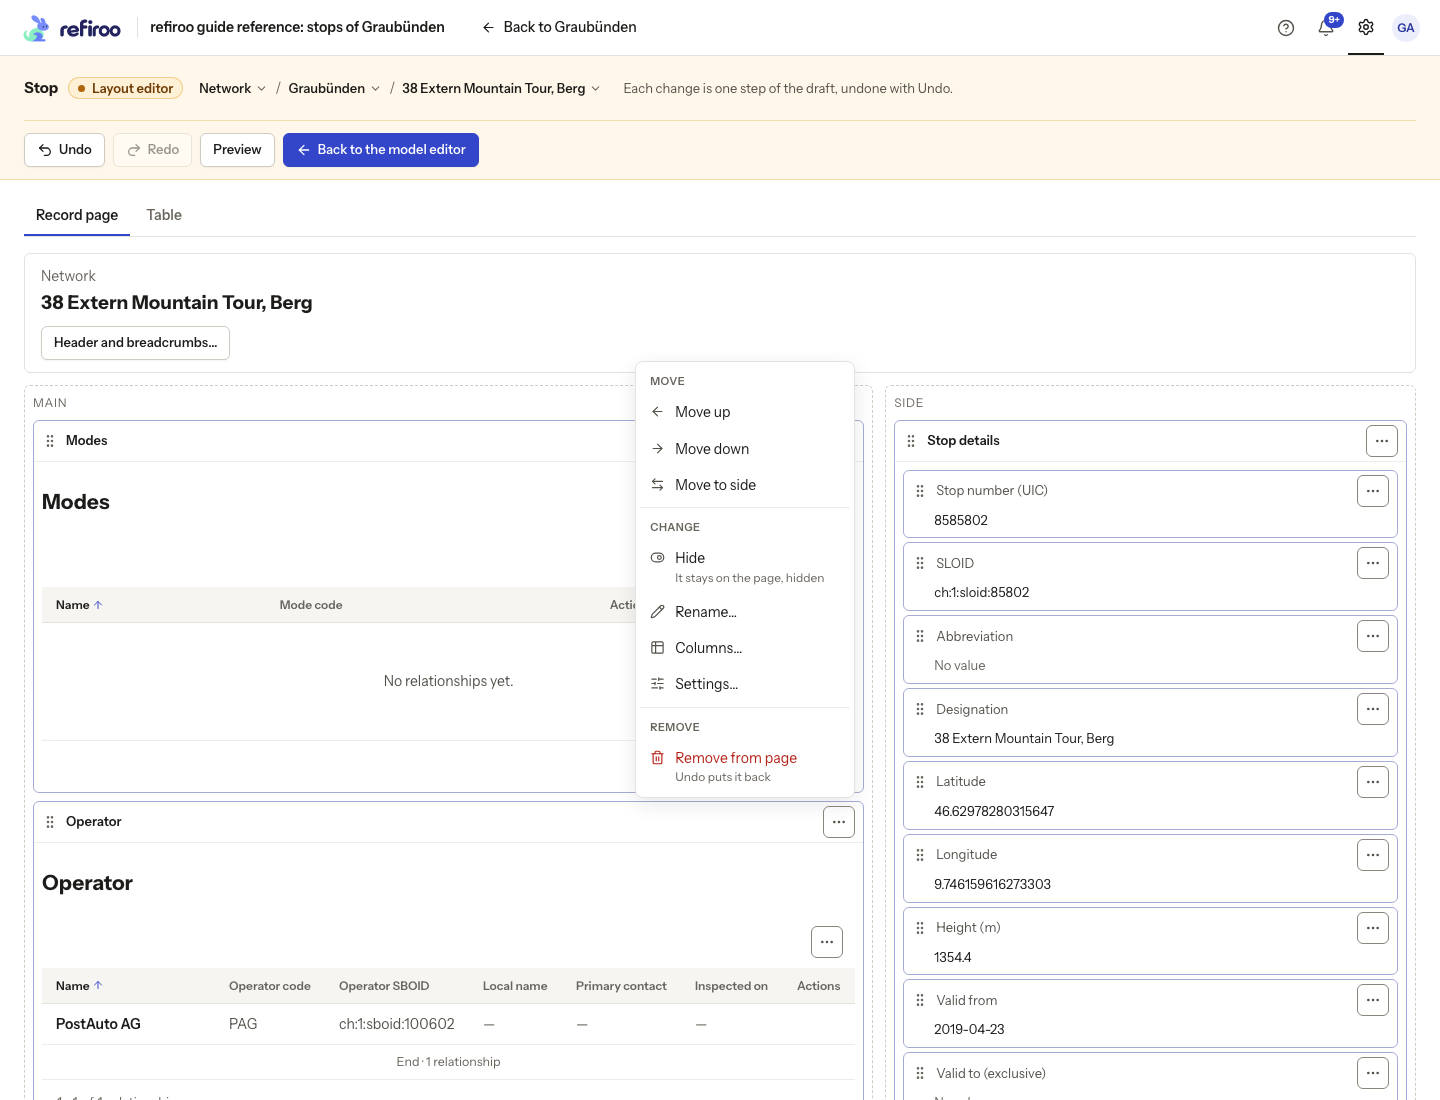
Section titled “Arrange panels and fields”- Open a panel’s menu. Move up, Move down and Move to Main or Move to Side change its position. A grip can also drag it within a region or into the other region. On a phone, or with a keyboard, use the menu.
- Choose Rename… to change Title. Hide keeps a panel in the layout but hides it from the record page; Show restores it. Remove from page takes it off the page, with Undo available afterwards. Stored records and values remain.
- For a field, use Move up, Move down or Move to … to place it in a field group. Remove from panel takes it off that group. Dragging a field onto another group or field is another way to move it.
- To make a field group in Main, choose New field group, give it Title and select Fields. Choose Apply in the popover. Selected fields move into it from their current positions. To add an omitted field to an existing group, use its Add fields… menu and select from Fields not on the page. This does not create a new field definition.
Check the result
Section titled “Check the result”Return to preview and inspect a populated record and an empty record. Check the page with records that have different relationships or parents. Review Issues before installing and activating the release. If an action shows Not applied, it has changed nothing: read the reason, correct the choice and try again.
Set the header and breadcrumbs
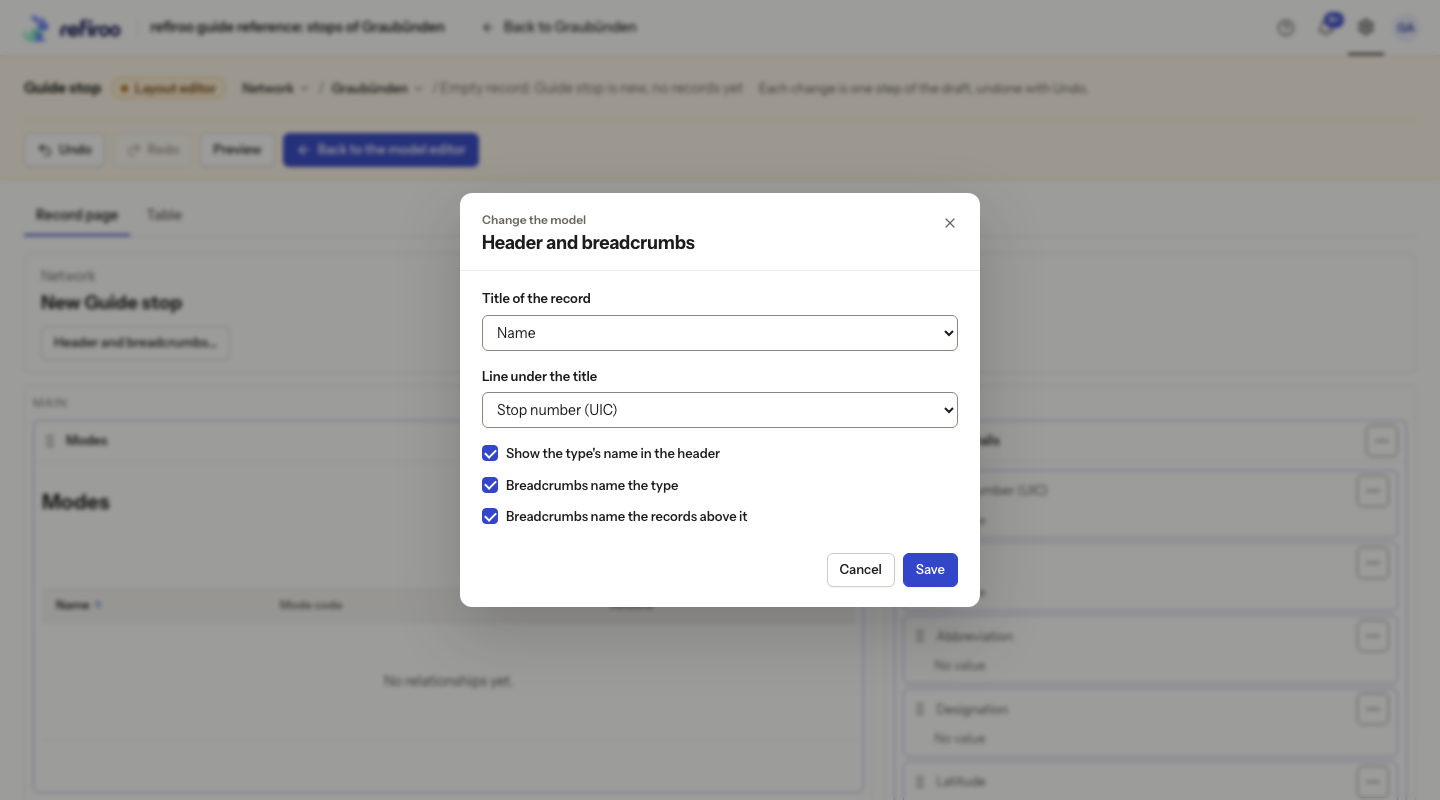
Section titled “Set the header and breadcrumbs”- In Record page, choose Header and breadcrumbs….
- Select Title of the record from Name or an attached field. Line under the title adds a second field; choose None to remove it.
- Choose Show the type’s name in the header as needed. Breadcrumbs name the type also shows the type in the header; Breadcrumbs name the records above it shows parents in the line above the title. That line starts with the list link when opened from a list, without an application entry. These choices do not change a record’s parent or name.
- Choose Save and inspect the preview with a record that has parents. Undo restores the saved step.
Change what a panel lists
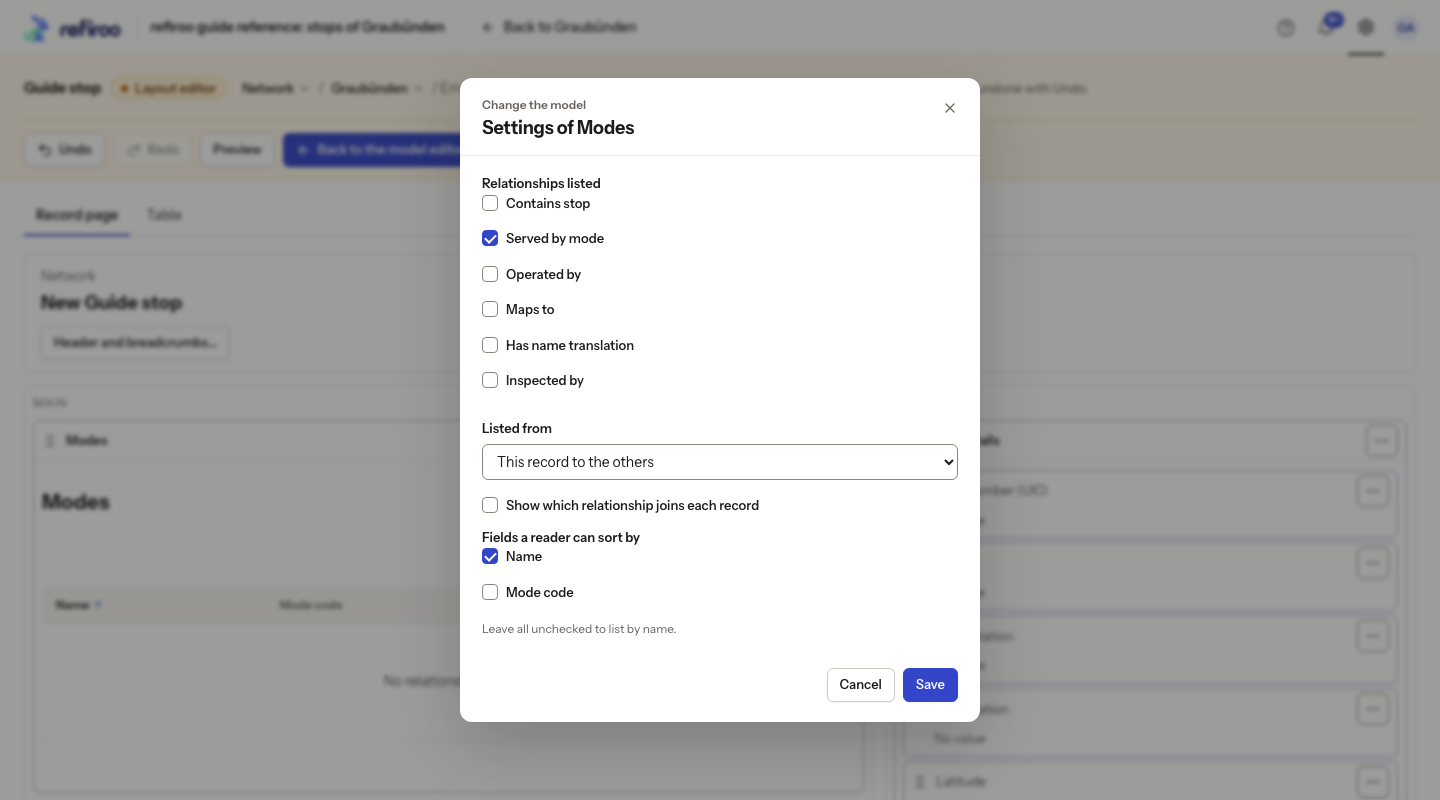
Section titled “Change what a panel lists”- Open the panel’s menu and choose Settings…. Fields groups have no extra settings.
- For related records, select Relationships listed and Listed from. Choose This record to the others, The others to this record, or Both ways. Tick Show which relationship joins each record when one panel combines several meanings.
- Select Fields a reader can sort by if people need a sort menu. Leaving these unchecked lists related records by name. A default sort no longer in the list moves to the first remaining choice, or is cleared when the list is empty.
- For hierarchy, set Show the parent and Show the records above the parent. For a contained-record or table panel, choose Rows on a page. A table also offers List only the records under this one; clear it only when the page should show that type’s records beyond the open record’s direct children.
- Choose Save and review columns, sorting and Issues. Changing settings does not rewrite stored connections. A panel with no matching records is empty; check its direction and selection before concluding that data is missing.