Split, merge and move types
Use these actions to reshape definitions in a draft. You need Model authoring. They do not move live records merely by saving. Read Types, attributes and relations.
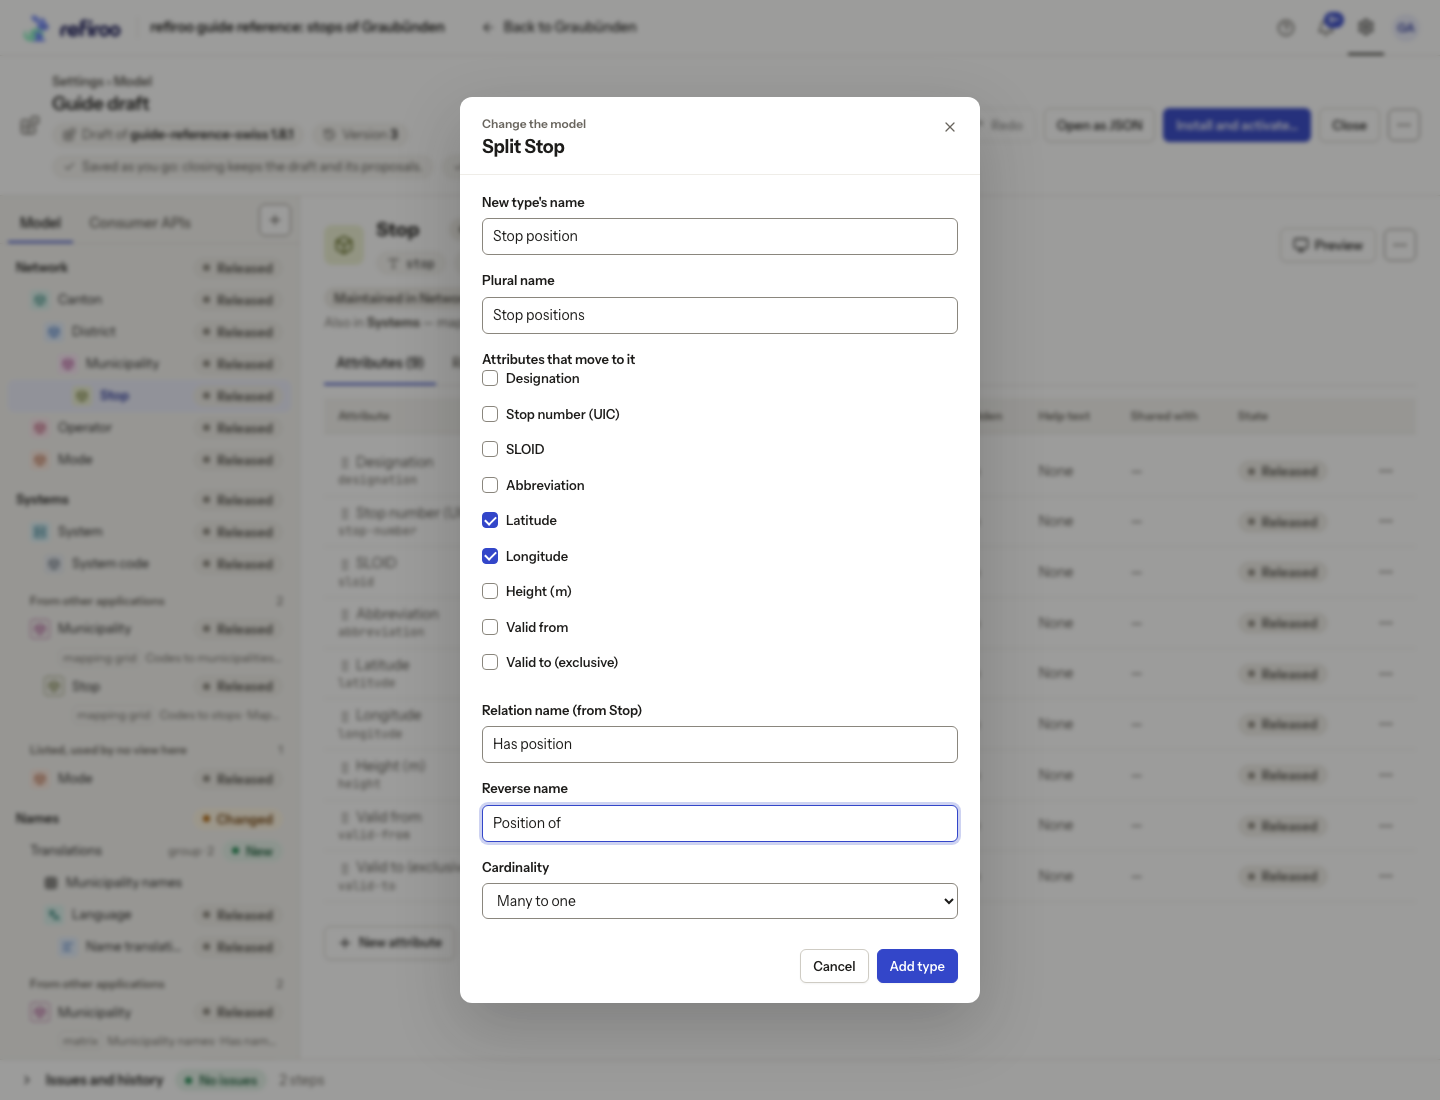
Split a type
Section titled “Split a type”- Select the type and choose Split… from its menu. It needs attributes to split.
- Enter New type’s name and, where needed, Plural name. Choose Attributes that move to it. The selected attachments belong to the new type after the split.
- Enter Relation name from the original type, Reverse name and Cardinality for the connection between them. Choose Add type and inspect both types, their relationship and layouts.
- If stored data uses the released type, History marks the step Needs a migration. Installing proposes related records holding the moved values. In the preview, open Created: a source record with no moved value gets no new record; with Many to one, records holding identical moved values share one new record. Its name comes from the first moved value, or the source record’s name if that value supplies no name.
Merge definitions
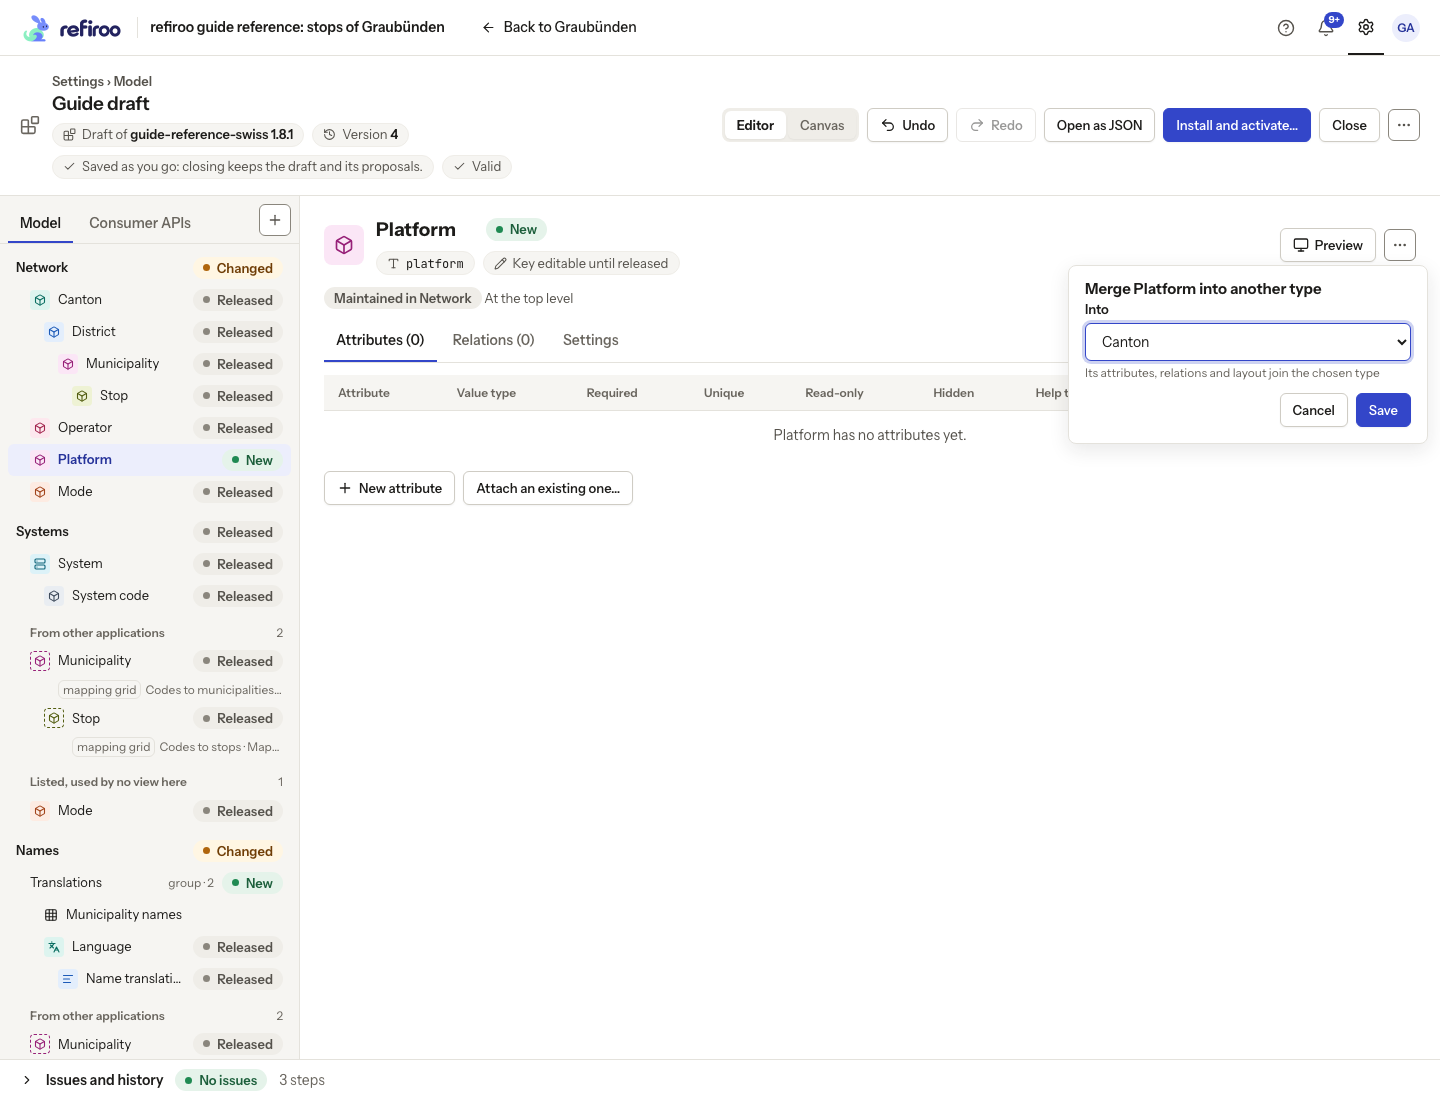
Section titled “Merge definitions”- Select the type to absorb and choose Merge into….
- Choose Into carefully. Its attributes, relations and layout join the chosen type.
- Choose Save in the popover and inspect the combined type and Issues. Use Undo if the result is unwanted.
- When stored data uses the released type, review its Needs a migration mark in History. Installing proposes that its records become the receiving type, keeping their identities and history. Check the proposed destination and all outcomes in the migration preview.
Move a type
Section titled “Move a type”- Choose Move to…. In Find a target, type a name, move with Up/Down and select with Enter. A destination can put the type under another type or at an application’s top level.
- For a contained destination, choose Containment relation, either a new relation or a suitable existing one. When several applications list the type, inspect Take it out of.
- For a released type, read Needs a migration when installed. The notice explains where the records go: a top-level destination releases them from their old parent; under another type, records whose existing parent is not allowed are refused in the migration preview.
- Confirm and check the type and the types under it. Dragging a type onto a type, an application or the space beside the tree opens the same decision. Use Move to… on a phone or by keyboard.
- If stored data uses the type, the step applies with a Needs a migration mark in History. Installing shows the proposed destination application and placement. Review the migration: moving to the top level removes the old parent and its containment relationship. The records go to the named application even when several applications list the type.
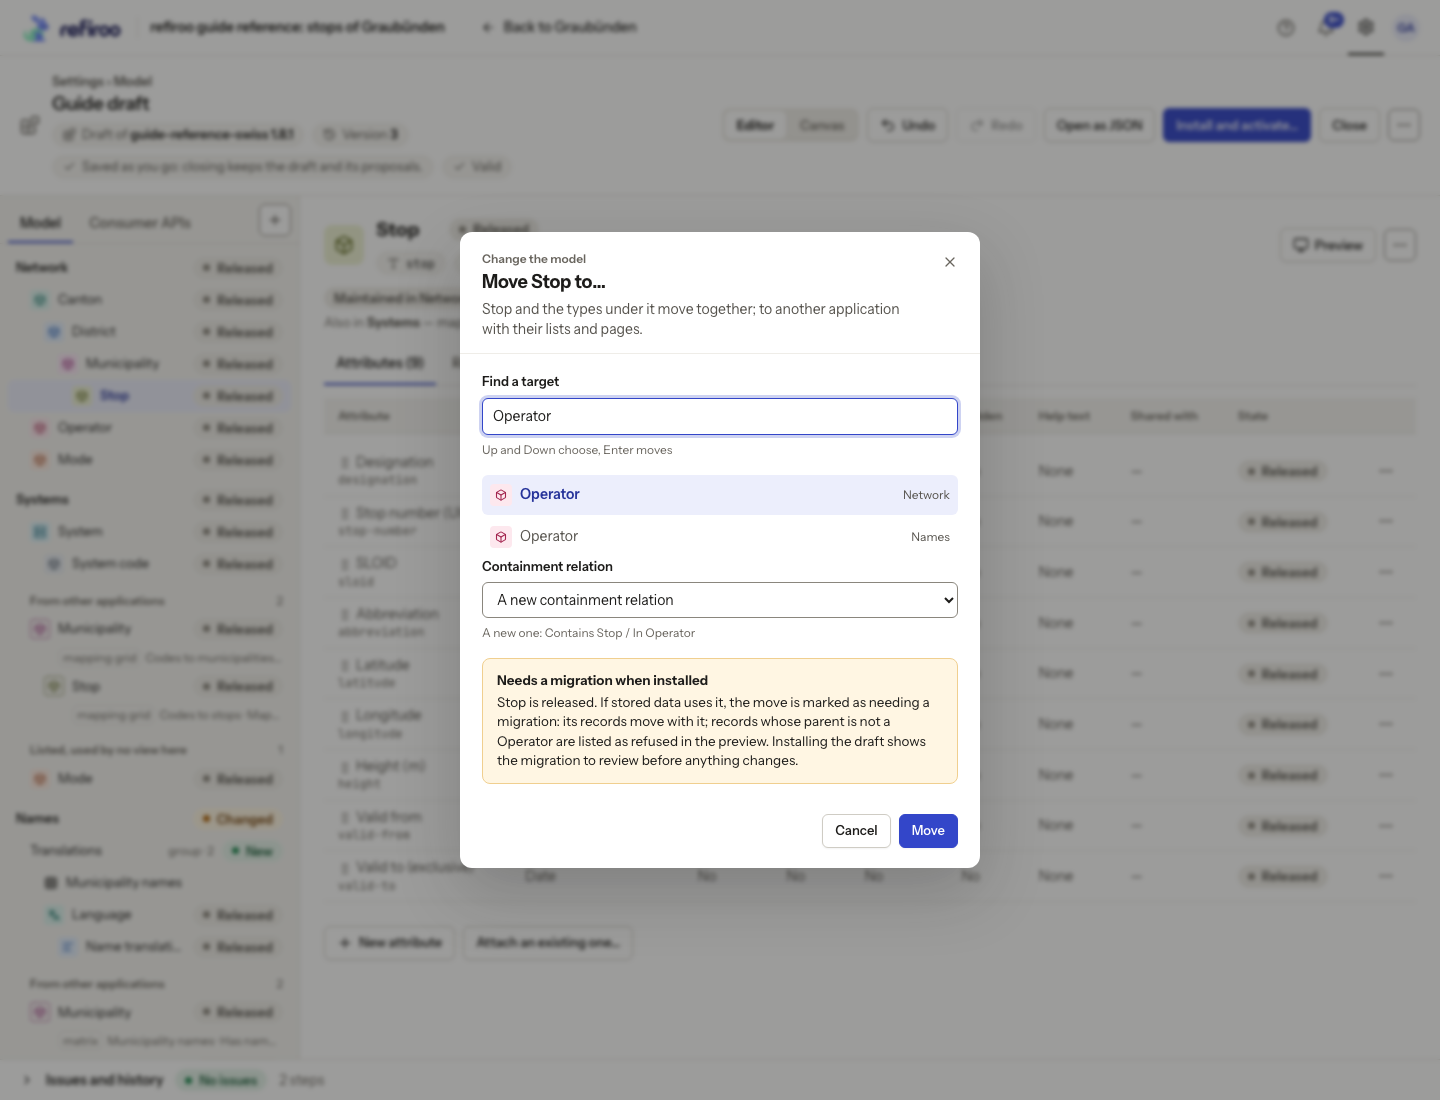
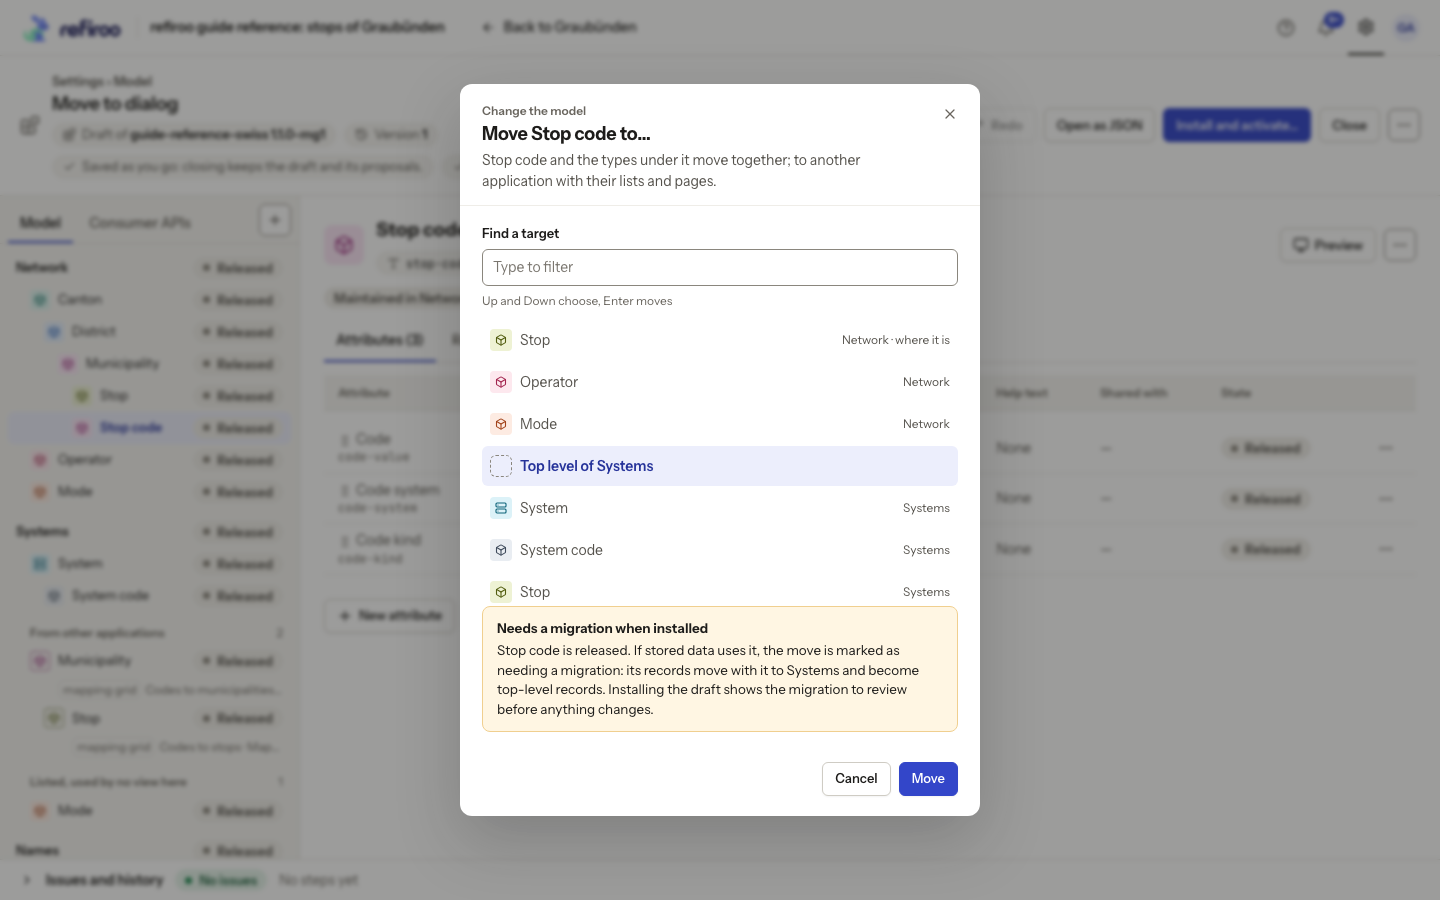
Above: Stop code is moving from under Stop in Network to the top level of Systems. The notice explains that its records move with it and become top-level records when the migration is confirmed.
Saving any of these steps changes the draft only. Use Install … and preview the migration… to review the proposed changes before migrating the workspace. Resolve items under Must be fixed and inspect any Removed items before accepting loss. Not moved or Not applied explains an edit that could not be saved. Stop listing in this application only removes a listing; Remove type removes its definition, views, page and relations at either end. Neither is a shortcut for moving existing data between models; use Copy and move.