Add a table, tree or mapping grid
Work in a draft with Model authoring. A view gives people a way to work with existing types; adding it does not create records. Read Applications and views for the structural rules. For cells at row and column intersections, use Add a relation matrix instead.
Start with the application
Section titled “Start with the application”- Select the application and choose Add a view… from its menu.
- Enter Name first; the dialog opens on it. The field has a red border while it is empty.
- Choose Kind of view. Only suitable kinds are offered. A table needs a type; a tree needs a listed type that permits records without a parent; a mapping grid needs an optional non-containment relationship. Add those definitions first if the kind is missing.
- Complete the form for that kind below, then choose Add view. Check Views and Issues. Not applied means the step was refused: read its reason and revise the choices. Cancel leaves the draft unchanged.
Choose Table: the records of one type in rows and select Type. The application also lists the type if necessary. Columns, filters and sorting start from its attributes. After adding it, select the type and open Preview, Edit layout, Table; choose this view in View to arrange it.
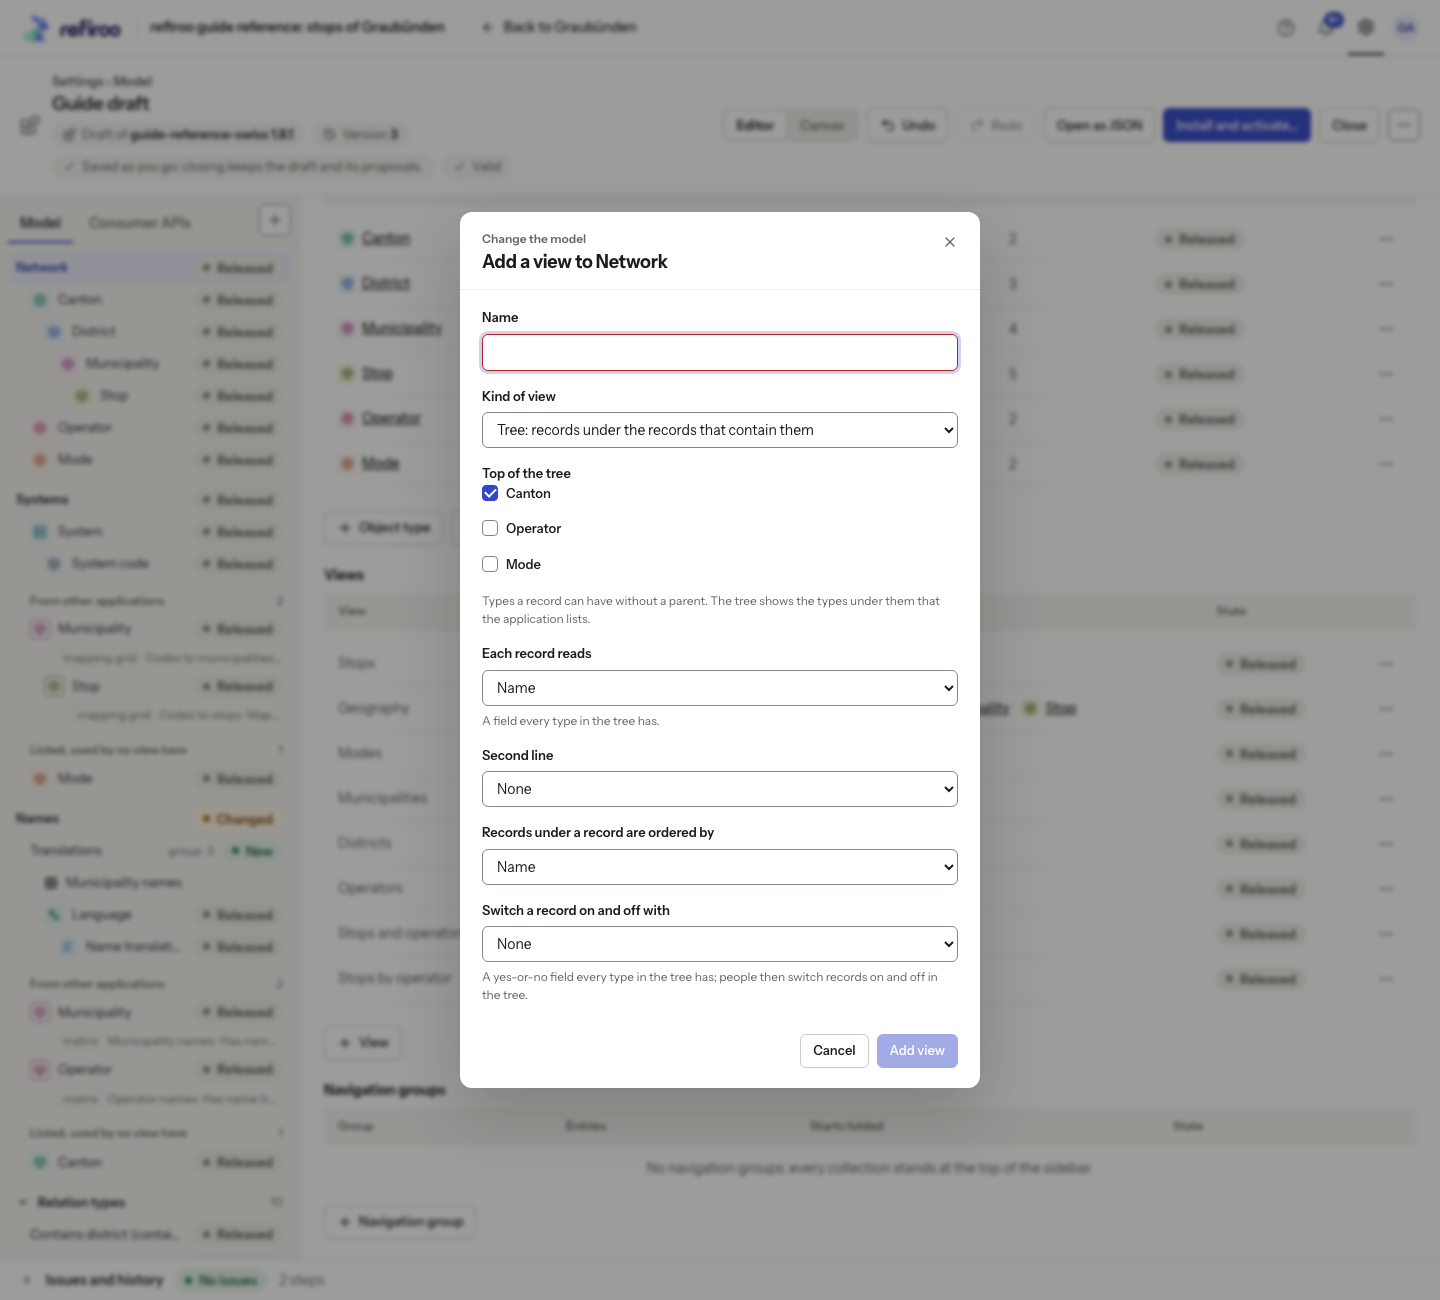
- Choose Tree: records under the records that contain them.
- Select Top of the tree. These are types that can stand without a parent. The tree includes the types beneath them that this application lists. List missing child types in the application before adding the tree.
- Set Each record reads to Name or a field shared by every shown type. Second line adds another shared field; None removes it.
- Set Records under a record are ordered by. The form applies that one field to child types. It starts with Name. More detailed per-type or descending ordering needs a specialist.
- For an on/off control, choose a common Yes or no field in Switch a record on and off with. Choose None for no availability action. A read-only field cannot support this action.
- Choose Add view. Review Issues. The form sets availability actions only; do not expect Create, Rename or Move just from choosing a tree. Ask a specialist to declare those separately when needed.
Mapping grid
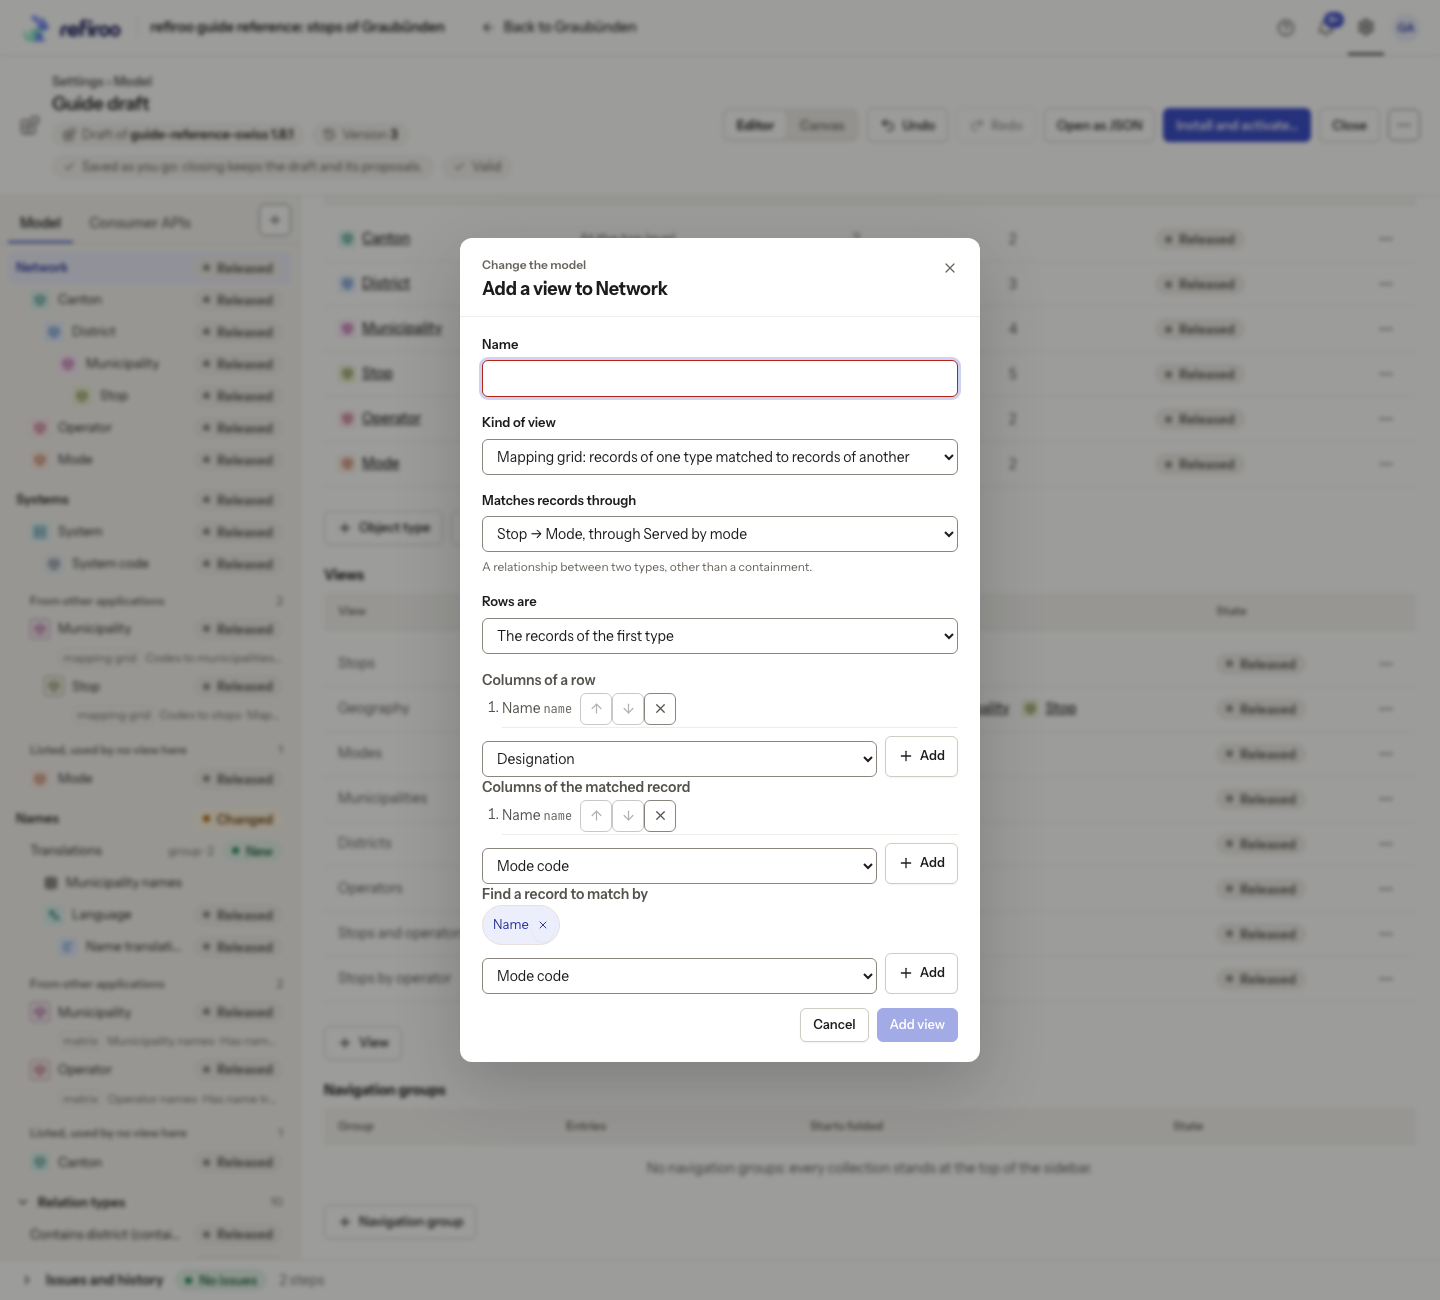
Section titled “Mapping grid”- Choose Mapping grid: records of one type matched to records of another.
- In Matches records through, choose the permitted relationship and its two types. Containment and required ownership are not offered.
- In Rows are, choose the first or second type. This decides which end chooses records at the other end. Changing the relationship or row end resets the column and search choices to Name: select them again afterwards.
- Choose and order Columns of a row and Columns of the matched record. Keep at least one in each list. Fields holding JSON are not offered. In Columns of a row, From the parents offers the types the row can stand beneath. Add one to show the name of each row record’s nearest parent of that type, even several levels above it. The type’s name heads the column. These parent names give context but are not searched when people search the grid’s rows.
- Choose Find a record to match by. Name and searchable attributes of the matched type are offered. This controls candidate searching, not a relationship’s eligibility rules.
- Choose Add view and check the resulting view and type listings. The new grid starts with 20 rows per page. A specialist can change that reading size.
Change or remove a view
Section titled “Change or remove a view”In Views, open a tree or mapping grid’s menu and choose Change…. Choose Save and review the saved step. On a tree, the form rebuilds actions from its availability choice: review any actions a specialist had previously declared. New trees start with 50 records per branch page; the change form preserves an existing reading size.
Rename… changes the label. Remove view removes the view and can stop listing types only it needed. Review the confirmation and remaining listings. Stored data remains. Use Undo to restore the draft step. Review the application’s Default view in Settings when changing its views, then install and activate when the draft is ready. People keep the current views until activation.