Edit a model on the canvas
Use the canvas to see object types and their relationships while you edit a model. It works with any draft, with or without a workbook. You need Model authoring; installing or applying the model needs the corresponding release permissions. See Models for those permissions and the difference between a draft, a release and the model running in a workspace.
Open a draft on the canvas
Section titled “Open a draft on the canvas”- Open a draft from Settings, Model, or choose Edit model in a workspace. Choose Canvas in the Editor | Canvas switch at the top.
- A draft normally opens in the view you last used for it in this browser. Without a remembered choice, it opens in Editor. A workbook flow opens it in Canvas. Switching views keeps the same saved definitions, steps and workbook mappings.
- Without a workbook, Workbook folds to a short panel offering Add a workbook…. You can build the model by hand without attaching a file. With a workbook, follow Shape a workbook on the canvas for the sheets, columns, reading instructions and row checks.
Find what you need on the board
Section titled “Find what you need on the board”-
Under Showing, choose the scope:
Choice What appears Whole model Every object type in the draft. Changed in this draft New or changed object types, with their parent object types for context. From the workbook The changed object types and those read by the workbook, with their parents. Without a saved scope, a workbook draft starts with From the workbook, and a draft without a workbook starts with Whole model. The chosen scope is kept on the draft.
-
Look for the application name on each frame’s border. The cards inside represent its object types. An object type without an application has no frame. A type used in several applications still has one card and one definition.
-
Read each card’s mark: New means added in this draft, Changed means different from its base release, and Released means unchanged. Proposed identifies an unchanged workbook suggestion. Unchanged released cards not read by the workbook appear quieter.
-
Use the arrow beside a card’s name to fold it to its top bar; press it again to unfold. Folding is kept on the draft, so others opening it can see that arrangement too.
-
Use Find an object type or attribute (⌘K) above the board, or press Ctrl+K or Command+K. Type a name, use Up and Down to choose a match, then Enter. The board centres on it and selects it. A match outside the current scope switches the board to Whole model. Unfold a folded card to see its attribute rows.
-
Use −, the percentage, + and Fit to zoom out, return to 100%, zoom in or fit the whole board. Ctrl or Command with the mouse wheel also zooms. Zoom is remembered in this browser.
-
Drag a card’s top bar to place it. With focus on the card itself, the arrow keys move it in small steps. Escape cancels a card move or a connection you are carrying. Tidy arranges the visible cards within their application frames; it appears on a wide screen when there is more than one card.
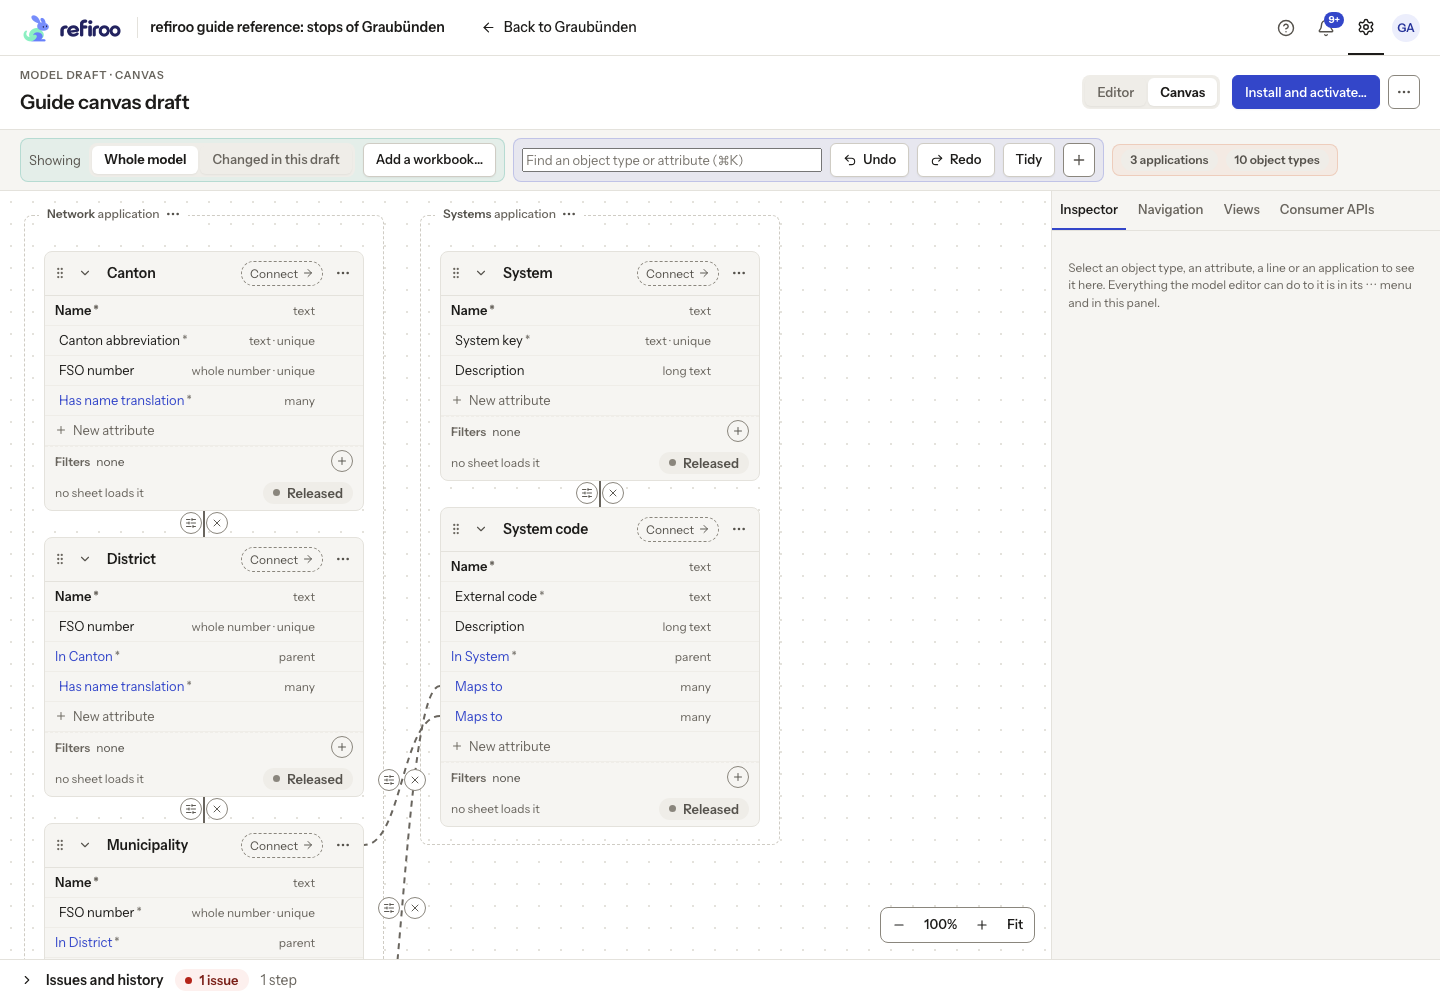
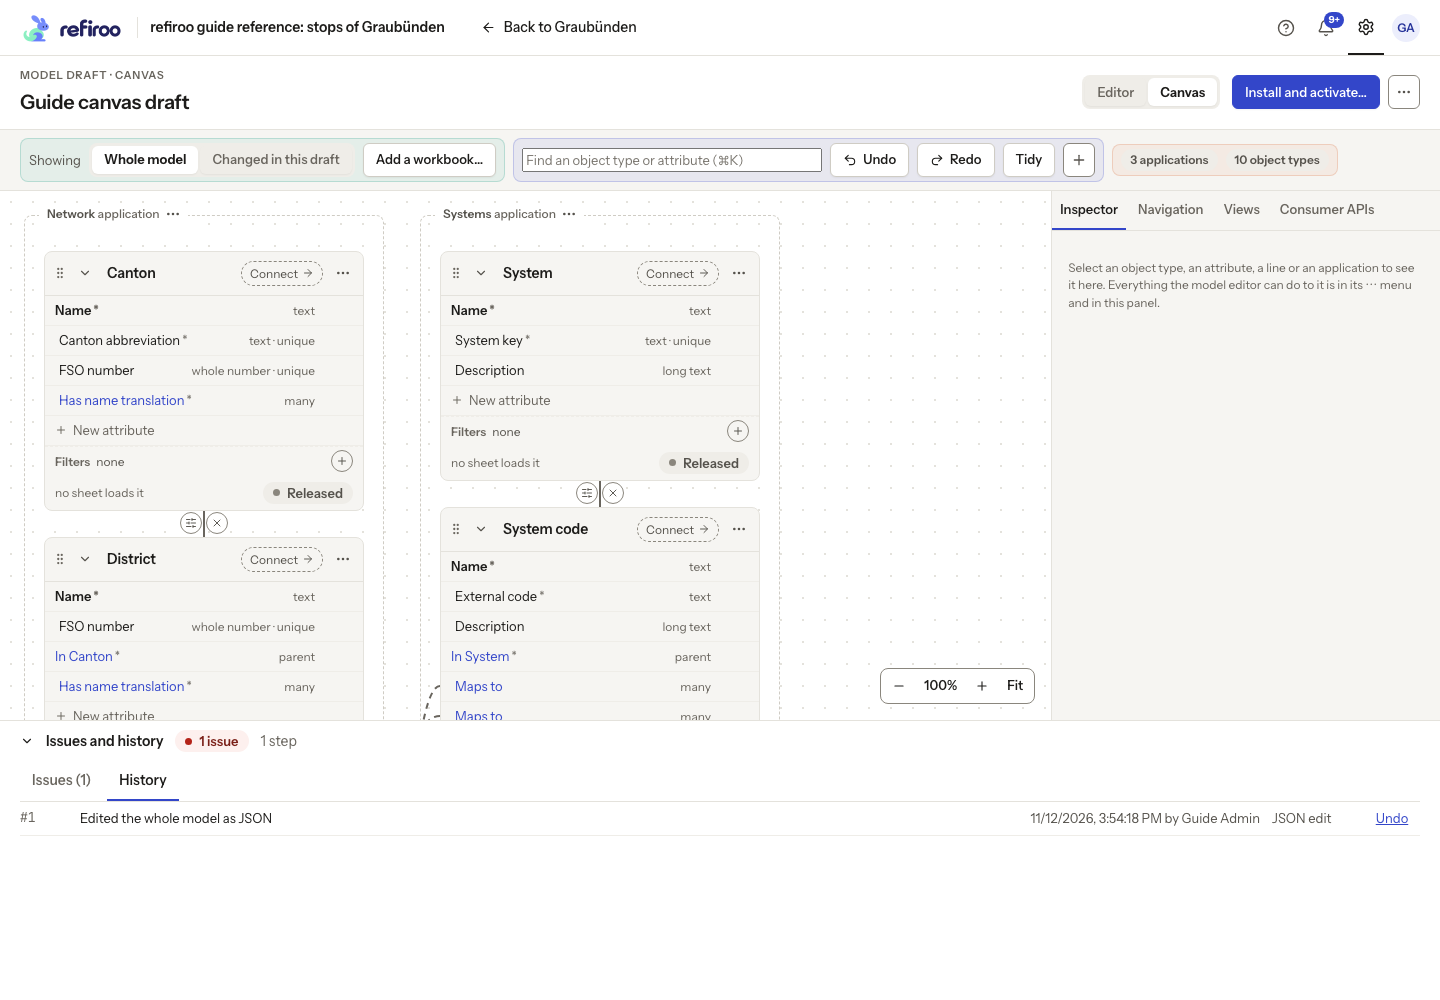
Above: Whole model is selected in Guide canvas draft. Network and Systems frame their object types; visible cards are marked Released, and Fit is at the lower right.
Positions, folding and scope are saved for the draft’s canvas. They do not change its model, version, history or installed releases. Bringing cards together does not connect them.
Add and rename definitions
Section titled “Add and rename definitions”- Open the + Add menu in the header. Choose Application…, Object type…, Attribute type…, Relation type… or Navigation group…. For an empty model, add an application first; object types and navigation groups need one.
- Fill in the editor’s form and apply it. For an object type, choose its application and where it may stand. The new object type is selected and brought into view; the board widens to Whole model if needed to show it.
- Press New attribute at the foot of a card to define and attach an attribute. Review its value type and rules. Adding a reusable Attribute type… through the header alone does not attach it to an object type; use the object’s attribute actions to reuse it.
- Select an object type’s or attribute’s name where it stands to rename it. Leaving the text input or pressing Enter saves it; Escape restores the old value. An unchanged value saves no step. A refusal keeps the input open with its reason so you can correct it.
- Renaming changes a label. To change an element’s key, use its separate menu action and review the migration and integration consequences before applying a release.
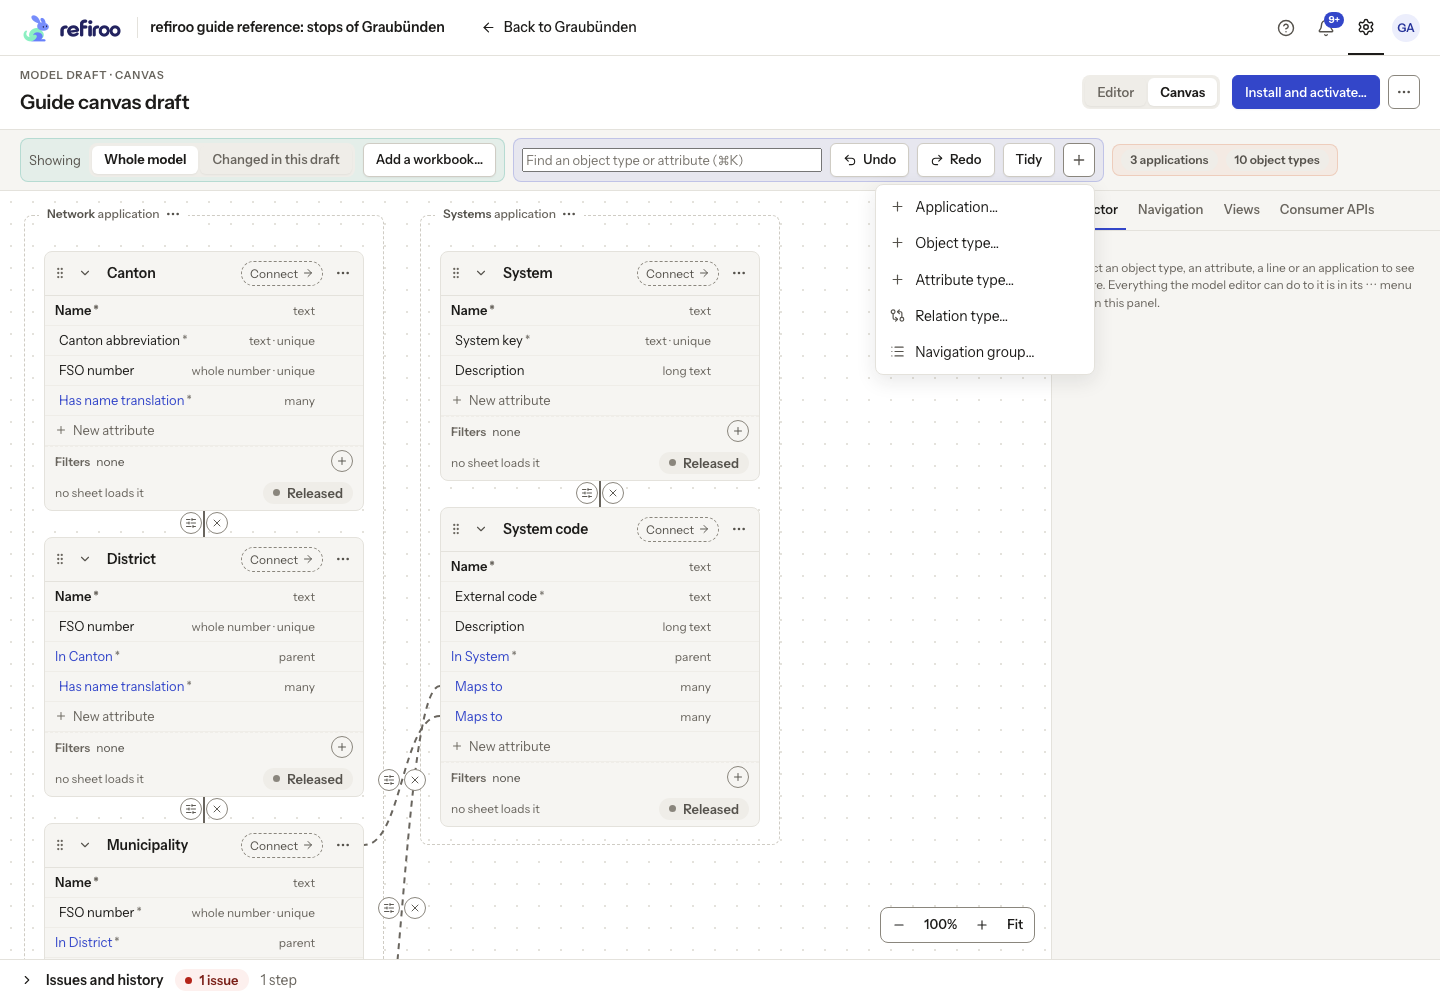
Above: The header’s + menu offers Application…, Object type…, Attribute type…, Relation type… and Navigation group….
Types, attributes and relations explains reusable definitions and the rules on their attachments.
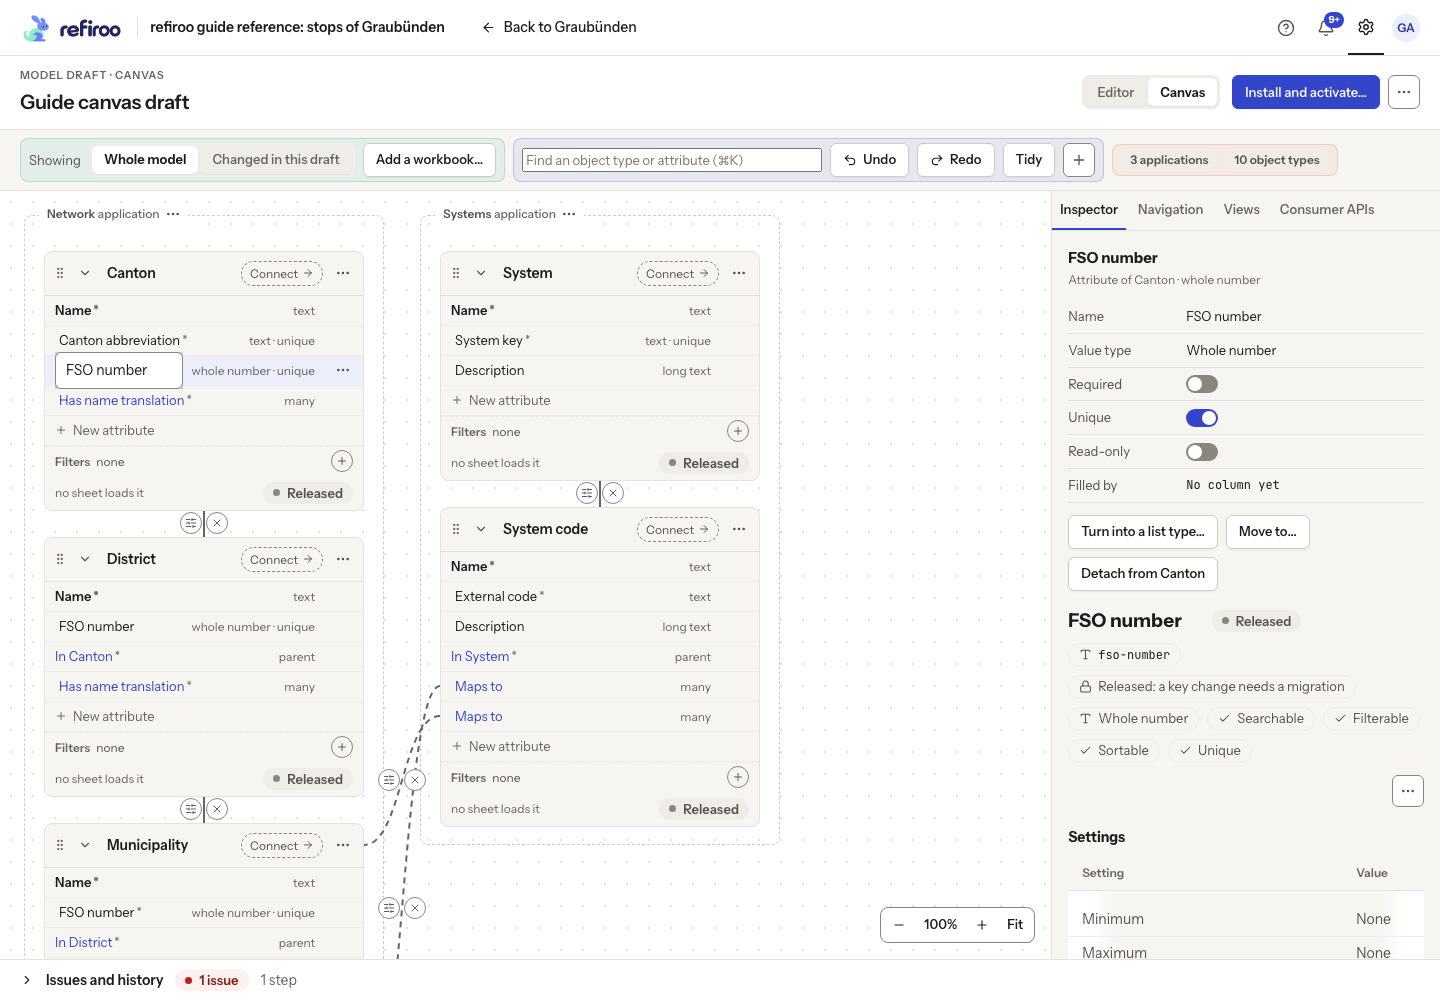
Above: FSO number on Canton is a Whole number. Required is off and Unique is on; the inspector also offers Move to… and further operations.
Use an element’s menu
Section titled “Use an element’s menu”- Select a card or one of its rows, then open ⋯. A right-click, Shift+F10 or the context-menu key on that element opens the same operations. Use Tab and Enter to open menu buttons with the keyboard.
- Each menu offers the model editor’s actions for that element. Object type menus include placement and attribute actions; attribute menus include Move to…, Move up and Move down where applicable. The card menu’s Canvas section also offers Put under, Relate to, workbook filters and placement in navigation groups. Remove object type appears when the type reads the workbook: it removes those readings, and also removes the type from the draft if it has only one reading, no relationship from another type and no child types.
- Select an application’s name on a frame to inspect it, or open the frame’s ⋯ menu. Right-click the frame or use Shift+F10 on its name for the application’s operations.
- Use the group and entry menus under Navigation, the view menus under Views and the contract menus under Consumer APIs for those elements. Their actions and forms are the same ones the editor uses.
- Read any disabled action’s explanation. If a step is refused, read Not applied and correct its cause. A grouped step saves together; a refusal does not apply part of it. A saved draft can still have issues that must be resolved before installation.
For an attribute move, dragging its row onto another card is also Move to…. Drag beside another attribute in the same card to reorder it, or use Alt+ArrowUp and Alt+ArrowDown on the focused row. These change the model, unlike moving the whole card.
Connect object types and inspect a line
Section titled “Connect object types and inspect a line”- Drag Connect from a child object type onto its parent’s card. The child goes under that type, with a solid line showing containment. To make a relationship instead, drop Connect onto an attribute row of the destination, or hold Alt while dropping onto its card. Relationships appear as dashed lines.
- Without dragging, use the card menu’s Put under or Relate to actions. Pressing Enter on Connect also opens a chooser for these actions and navigation groups.
- Select a relationship line, or Tab to its rule button and press Enter. Review How many and Required. Attributes of the relationship controls values the link carries; Which records may be chosen sets its candidate rules. Only applicable controls appear. Changes use the same operations as the editor.
- A containment line explains the parent and child types and offers its operations menu; it has no separate relationship-rule controls here. For other actions on a line, use its All operations menu. Right-clicking a line or pressing Shift+F10 on its rule button opens the rule popover too.
- The line’s × removes the connection. A removed containment sends the child to the top level. If workbook mappings use a removed connection, inspect them and the new dry run.
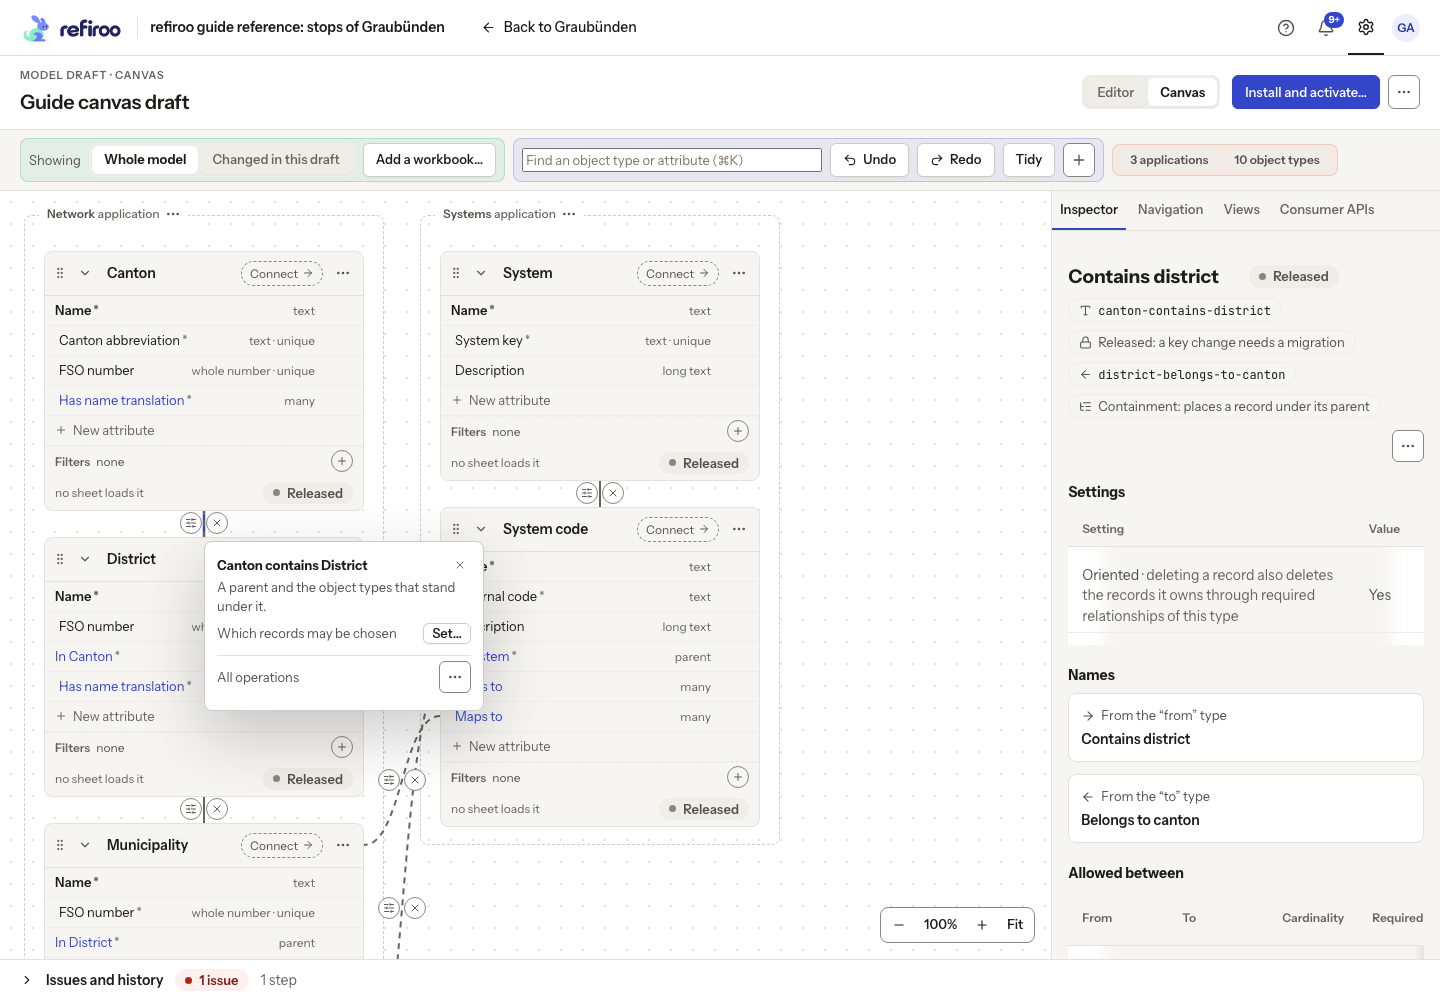
Above: Canton contains District is selected. Its popover explains the parent and child types and offers Which records may be chosen and All operations.
With workbook sources, connecting also tries to find the column supplying the link. A tied choice asks you to choose; a notice explains when the link has no column filling it.
Work in the inspector
Section titled “Work in the inspector”The right pane has four tabs. It uses the model editor’s panels and forms, so changes made here are saved in the same history and are visible in Editor too.
- Inspector follows the selected object type, attribute, relationship, application or navigation group. For an attribute, review Value type, Required, Unique, Read-only and Filled by, with further definition controls below. A workbook column opens the editor’s column panel; the sheet name at a card’s foot opens its list panel. There you can adjust the range and, when offered for a keyed reading, choose whether to report or delete records no row names. Read the deletion confirmation before accepting it.
- Navigation shows each application’s groups and their entries. Use application, group and entry menus to add, rename, order and place them. Drag a card’s Connect onto a group, New group or Not in a group for placement. Without dragging, create groups from the application menu and use placement actions. See Group collections in navigation.
- Views shows the selected object type’s views and their operation menus. When a running model is available for preview, Preview tables and record page and Edit layout open the editor’s preview or layout editor in the main area. Use Back to the board to return. Follow Preview a type and Edit a record page for those tasks.
- Consumer APIs shows the editor’s contract list and selected contract panel. Its + adds a consumer API. Follow Define a consumer API to choose what other systems can read and review compatibility before release.
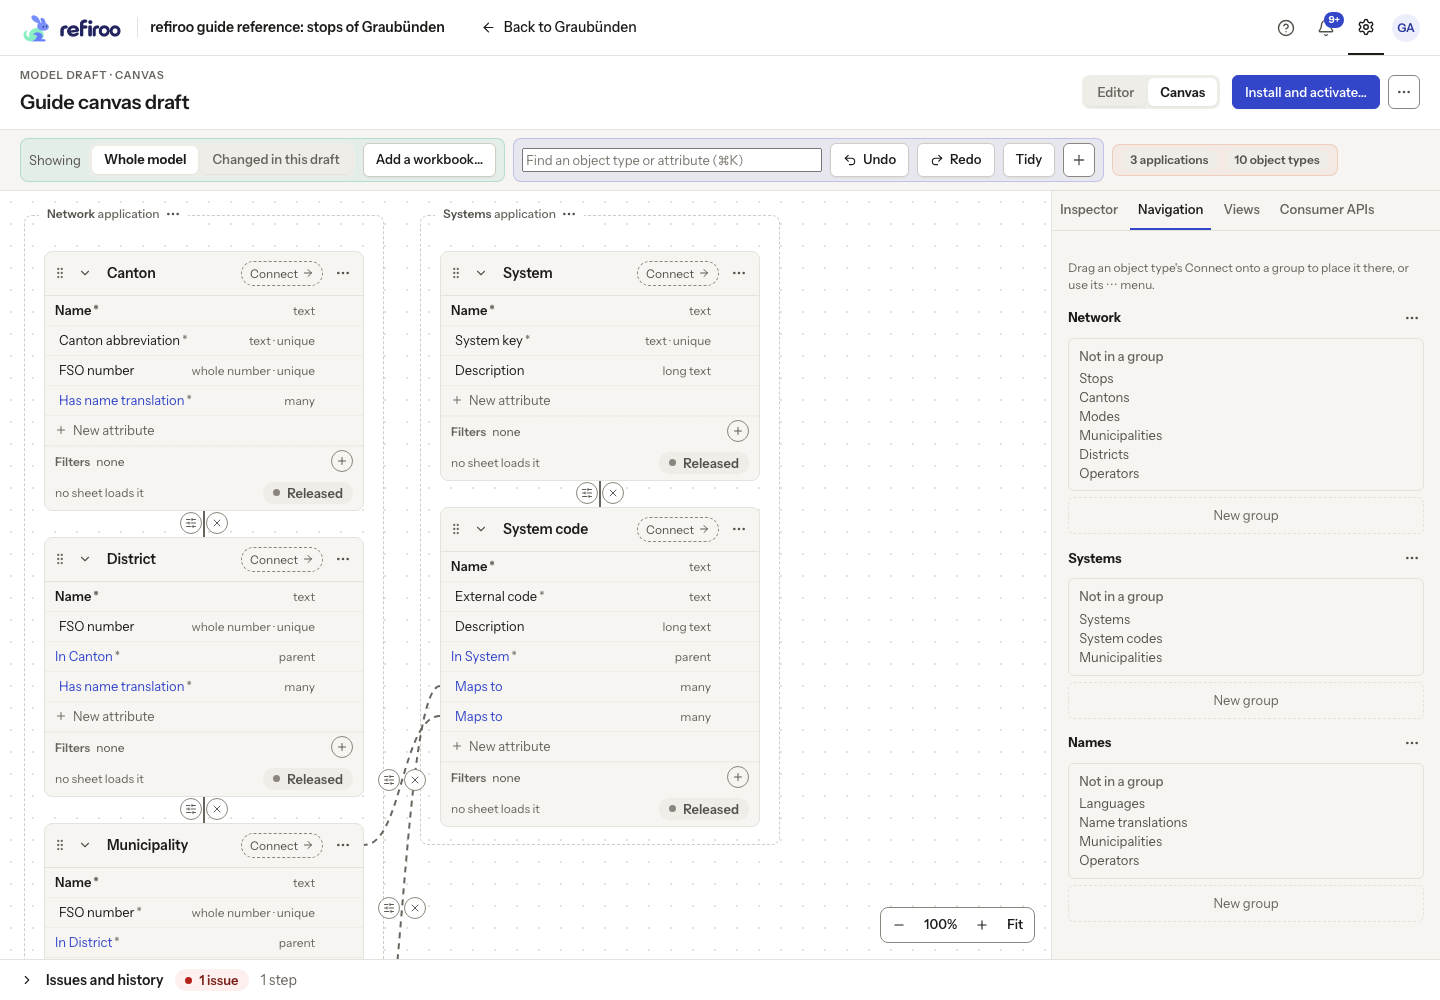
Above: Network, Systems and Names each show collections Not in a group and a New group destination.
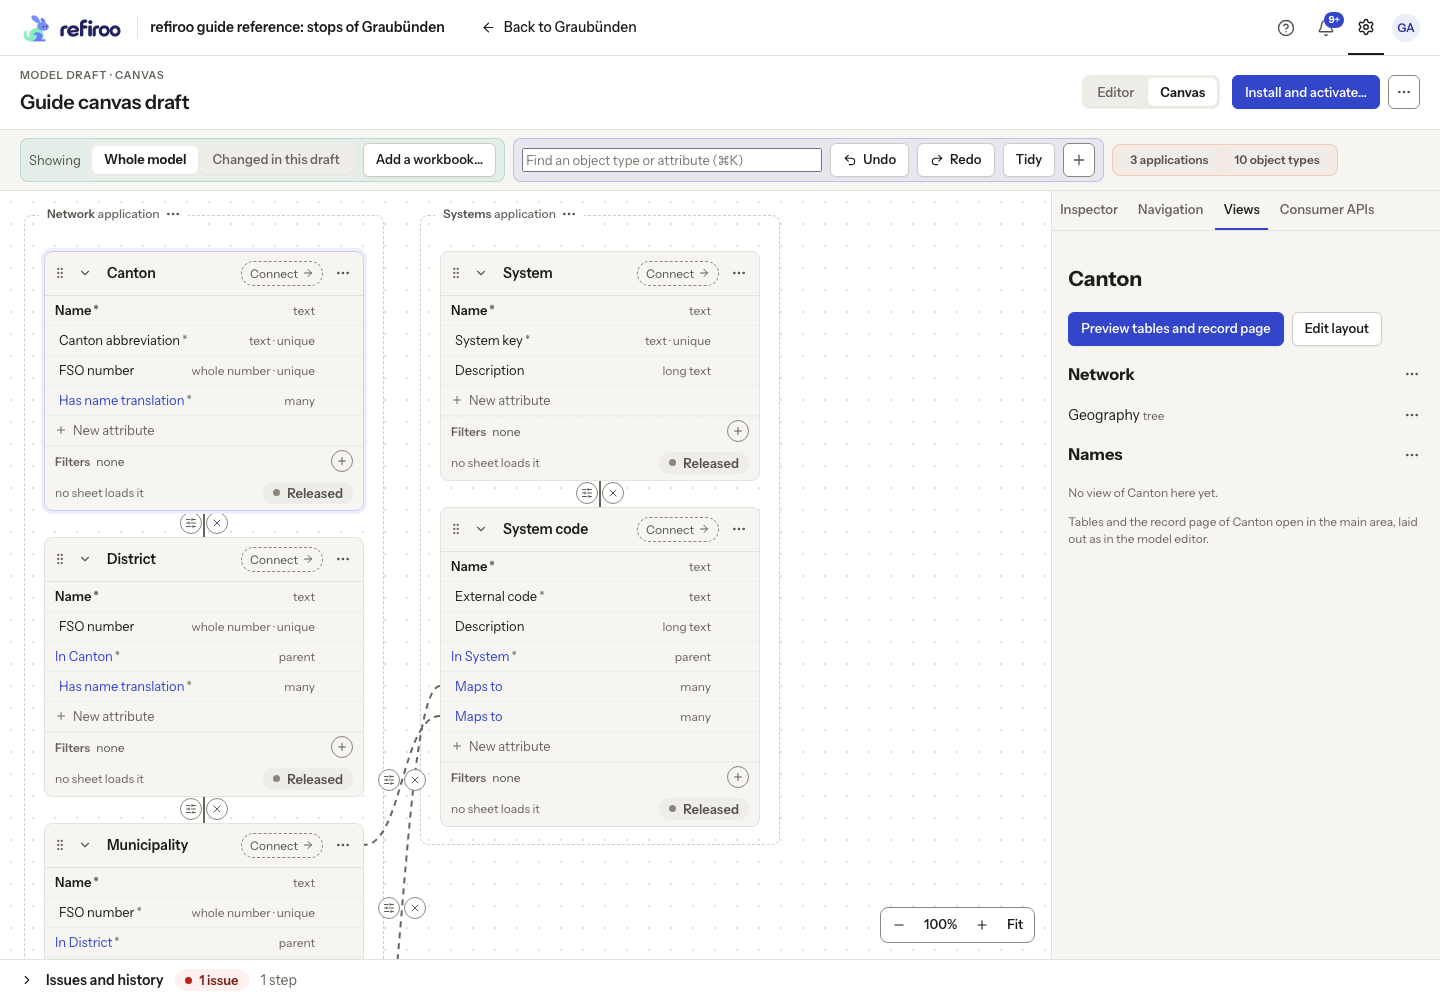
Above: Canton has a Geography tree in Network and no view in Names. Preview tables and record page and Edit layout are available.
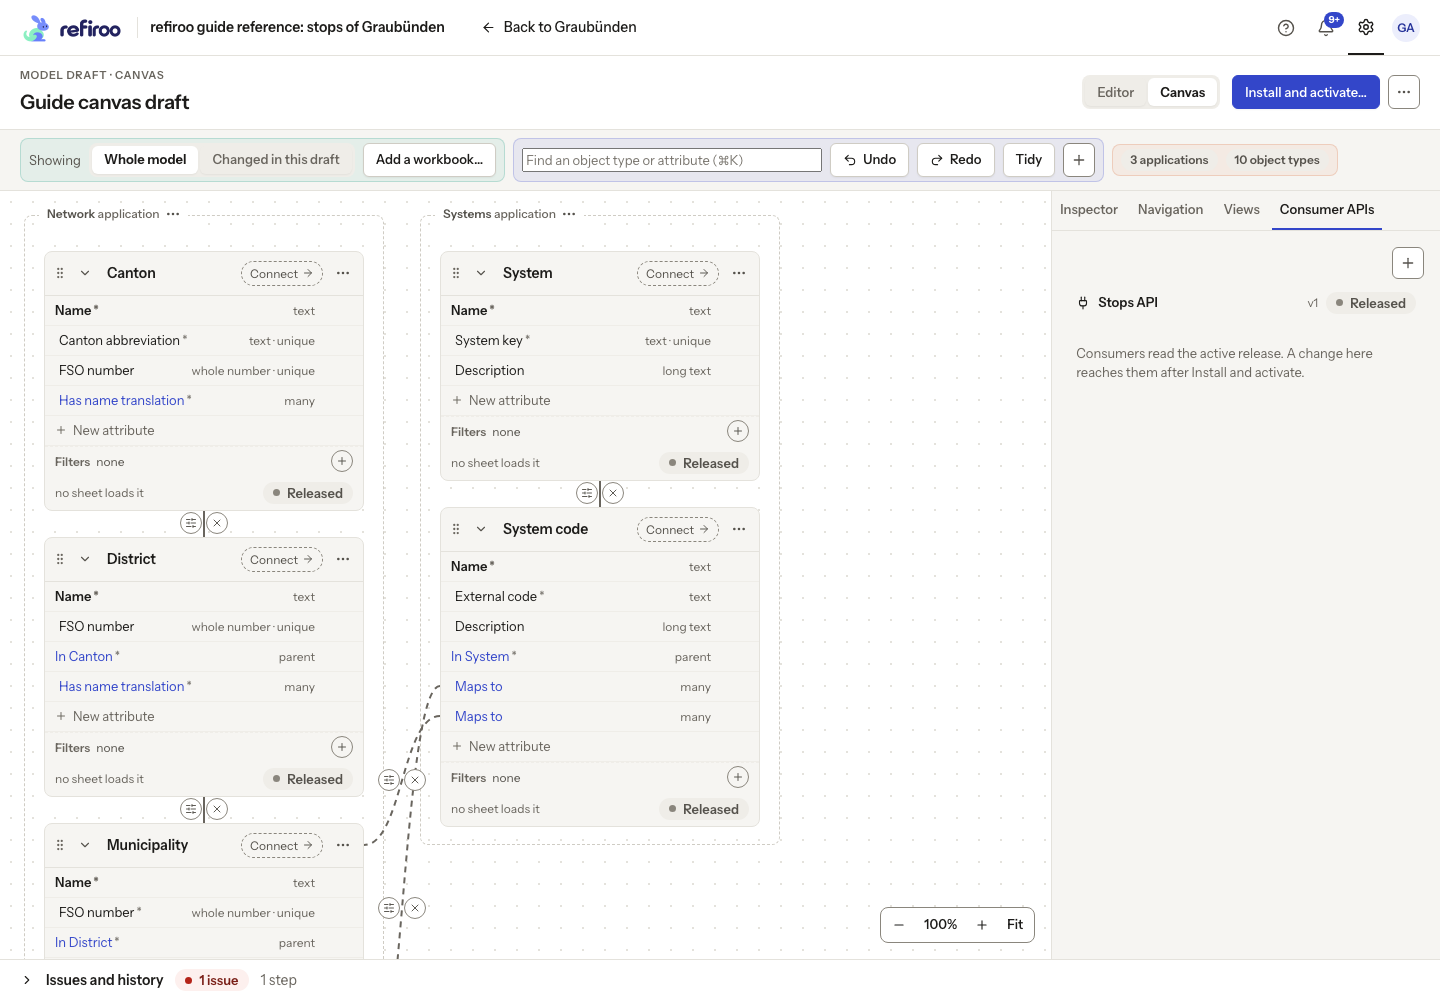
Above: The Consumer APIs tab lists Stops API, version 1, marked Released, with a + control to add another contract.
The canvas is a view of the draft, not a record editor: use a workspace’s record screens to change data, and Edit layout to arrange record pages and tables. Card positions do not become part of the model or determine those record layouts.
Review issues and history
Section titled “Review issues and history”- Expand Issues and history at the foot of the page. With a workbook it reads Issues, history and dry run. The bar counts issues and saved steps.
- In Issues, follow an issue to its object type, attribute or line, or to the relevant inspector panel. Fix blocking errors before installing. Read warnings too; No issues in the model does not prove workbook rows will load.
- In History, inspect saved steps and undo a chosen step. If later steps depend on it, refiroo explains which ones must be undone together. Undo and Redo in the header work on saved steps too; a new edit clears redo. Undo does not reverse an installed release or published records.
- With a workbook, inspect each source under Dry run and open refused-row figures. Wait for the latest check, including after a correction. Follow Check a workbook with a dry run.
- If Another change came first appears, read the intervening steps. Choose Apply mine again only if your change still belongs, or Discard mine. See Work on a draft with others.
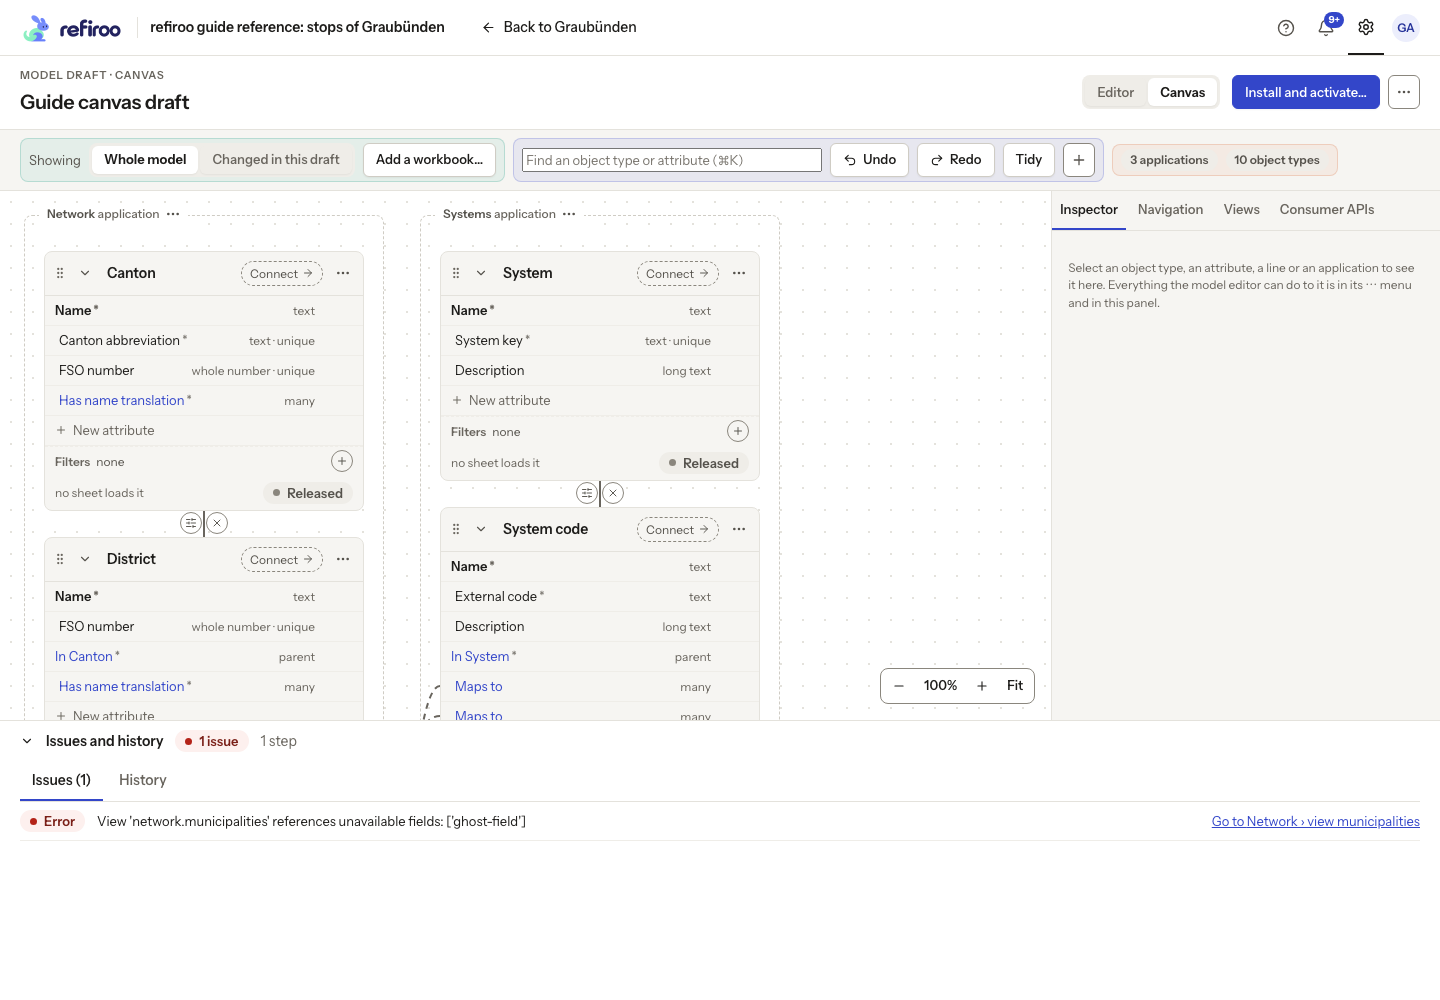
Above: The draft has one issue: a view refers to a field that does not exist. The link opens the affected Municipalities view in Network.
Above: History records one whole-model edit by Guide Admin and offers Undo for that step.
Finish or return later
Section titled “Finish or return later”- For a workspace draft, choose Apply to this workspace…. For other drafts, use Install and activate…. Read the differences, compatibility checks and any migration preview before applying; editing a draft alone does not change a running workspace. Install and activate a release explains the confirmation.
- With a workbook, Create workspace… is offered when you may create and install a model into a new workspace and a visible object type reads the file. It installs the model, creates the workspace and starts loading its rows into Live. A draft already belonging to a workspace offers Apply to this workspace… instead.
- Open More actions for Load into a change set… when a workbook is attached, Add a workbook… or Upload a newer workbook…, and Delete draft…. For a workspace draft, Install and activate… is also here. Propose again… is offered with an attached workbook; it reconsiders that workbook’s proposals.
- Leaving the page keeps saved draft changes. Delete draft… asks for confirmation and removes the editable draft, its history and workbook, leaving installed releases in place.
On a phone, the workbook, board and inspector stack in one column. Dragging, frames, lines, zoom and Tidy are unavailable. Use Connect, element menus and inspector panels for model changes; select a parent or relationship row to inspect it. The Editor view is also available at the top for working through its panes.