Move records to another model
Copy or move records into another workspace when its model differs. Arrange Copy and move access in the relevant workspaces and the data and change-set permissions needed for review and publication. Background jobs and model administration must be enabled. See Model mappings for matching rules and the difference between copy and move.
Open a mapping for the two workspaces
Section titled “Open a mapping for the two workspaces”- Open Settings, then Copy and move. Review Mappings and Recent copies and moves to avoid starting the same work twice.
- Choose New copy or move…. Select From workspace and To workspace. Check the model and release displayed beside each name; source and target must be different workspaces.
- Under Mapping, choose a saved mapping for these models or A new mapping, proposed. For a new mapping, fill Name of the new mapping so it can be recognised later.
- Choose Open the editor. Wait for the proposal and dry run. This prepares the mapping and check; it does not copy records. Cancel leaves the dialog without starting the flow.
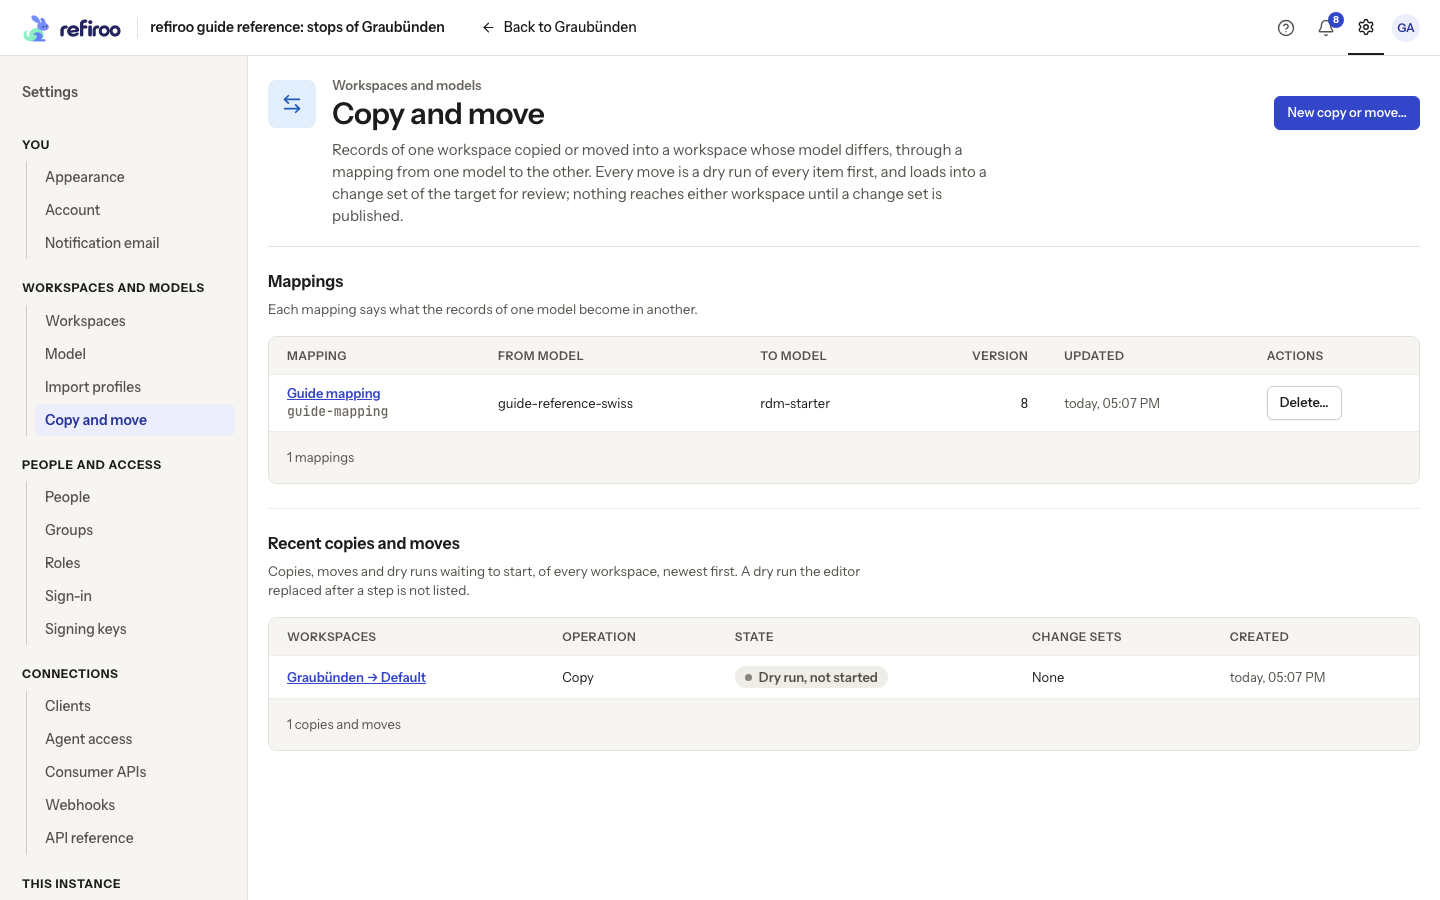
Above: Guide mapping connects the Graubünden model to RDM Starter Model. The recent entry is a dry run not started, not a completed copy.
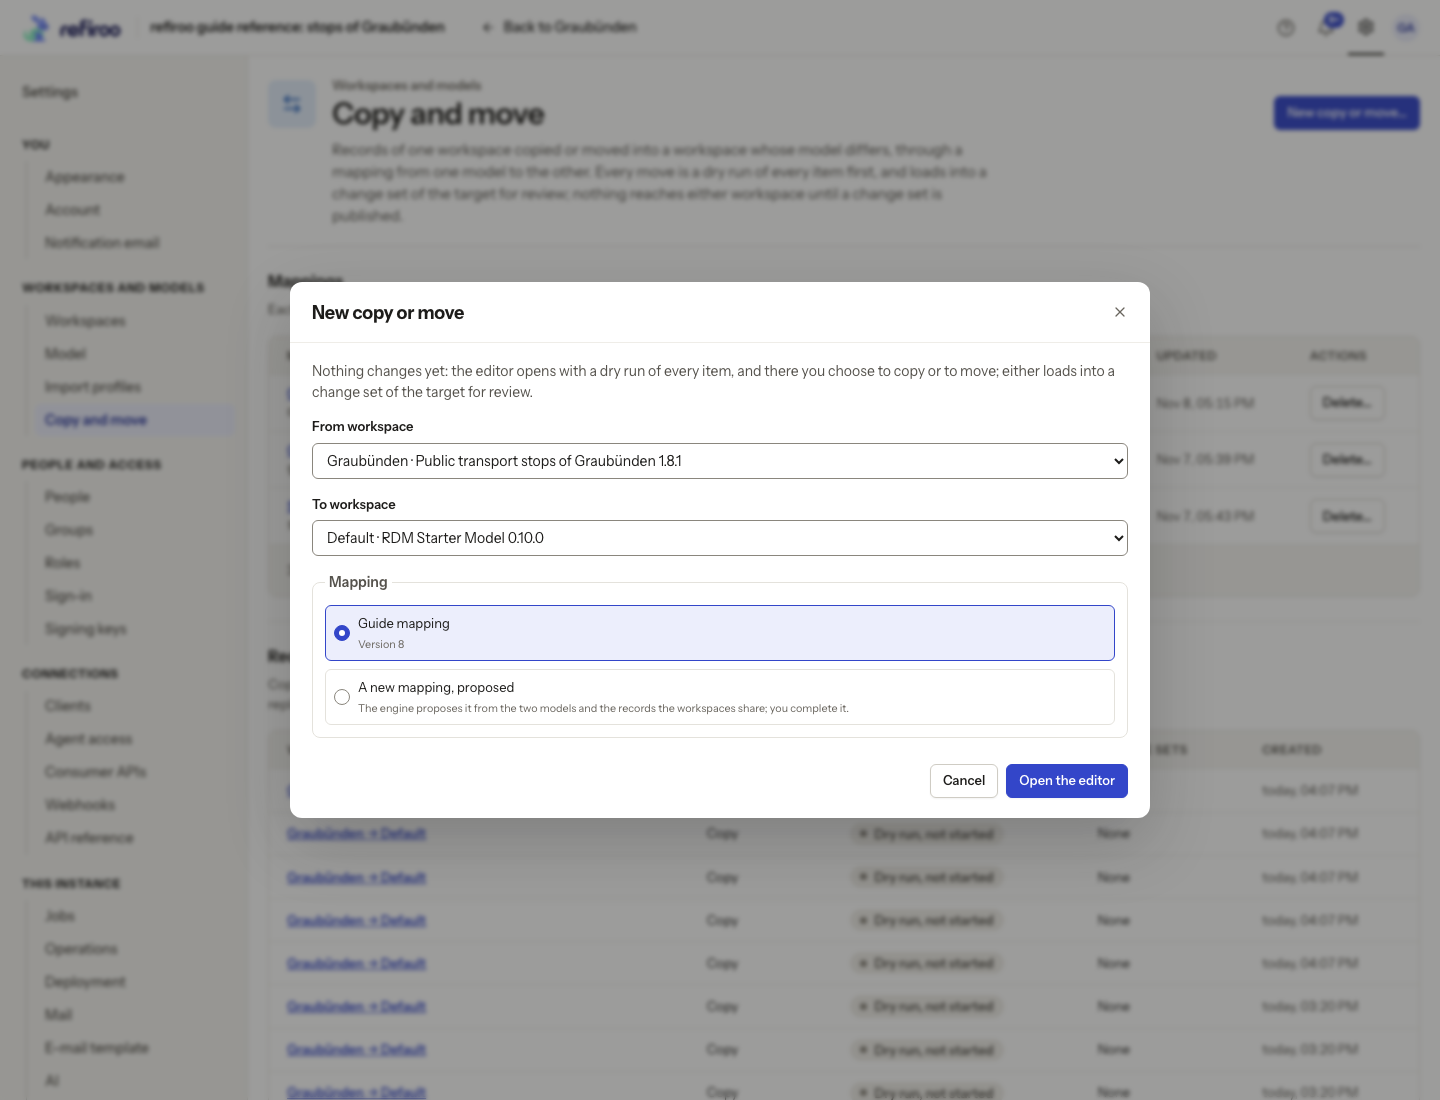
Above: Graubünden is the source and Default the target. Guide mapping is selected, with A new mapping, proposed offered below. The captured dialog was cancelled.
Complete the mapping
Section titled “Complete the mapping”- Review source types on the left and their mapped states. Select each mapping row and read Why this step and its evidence before accepting a suggestion; choose an alternative or change the row if the proposal does not represent your intended meaning.
- Check the target type, every field and every relationship. Not carried (reported) leaves a value out. Choose that only when its loss is intended. Map a required target field or supply a meaningful default where the editor offers it.
- Check Parent for contained records. A mapped child still needs a permitted parent in the target; carrying it under an incompatible parent causes a refusal.
- Check Records already in the target. Decide whether to find only records moved before or also match by an offered unique field. Review existing target values before allowing updates.
- Use Undo or Redo for mistakes. Wait for the refreshed dry run after a saved change. If saving is refused because the mapping changed elsewhere, reload it and review those changes.
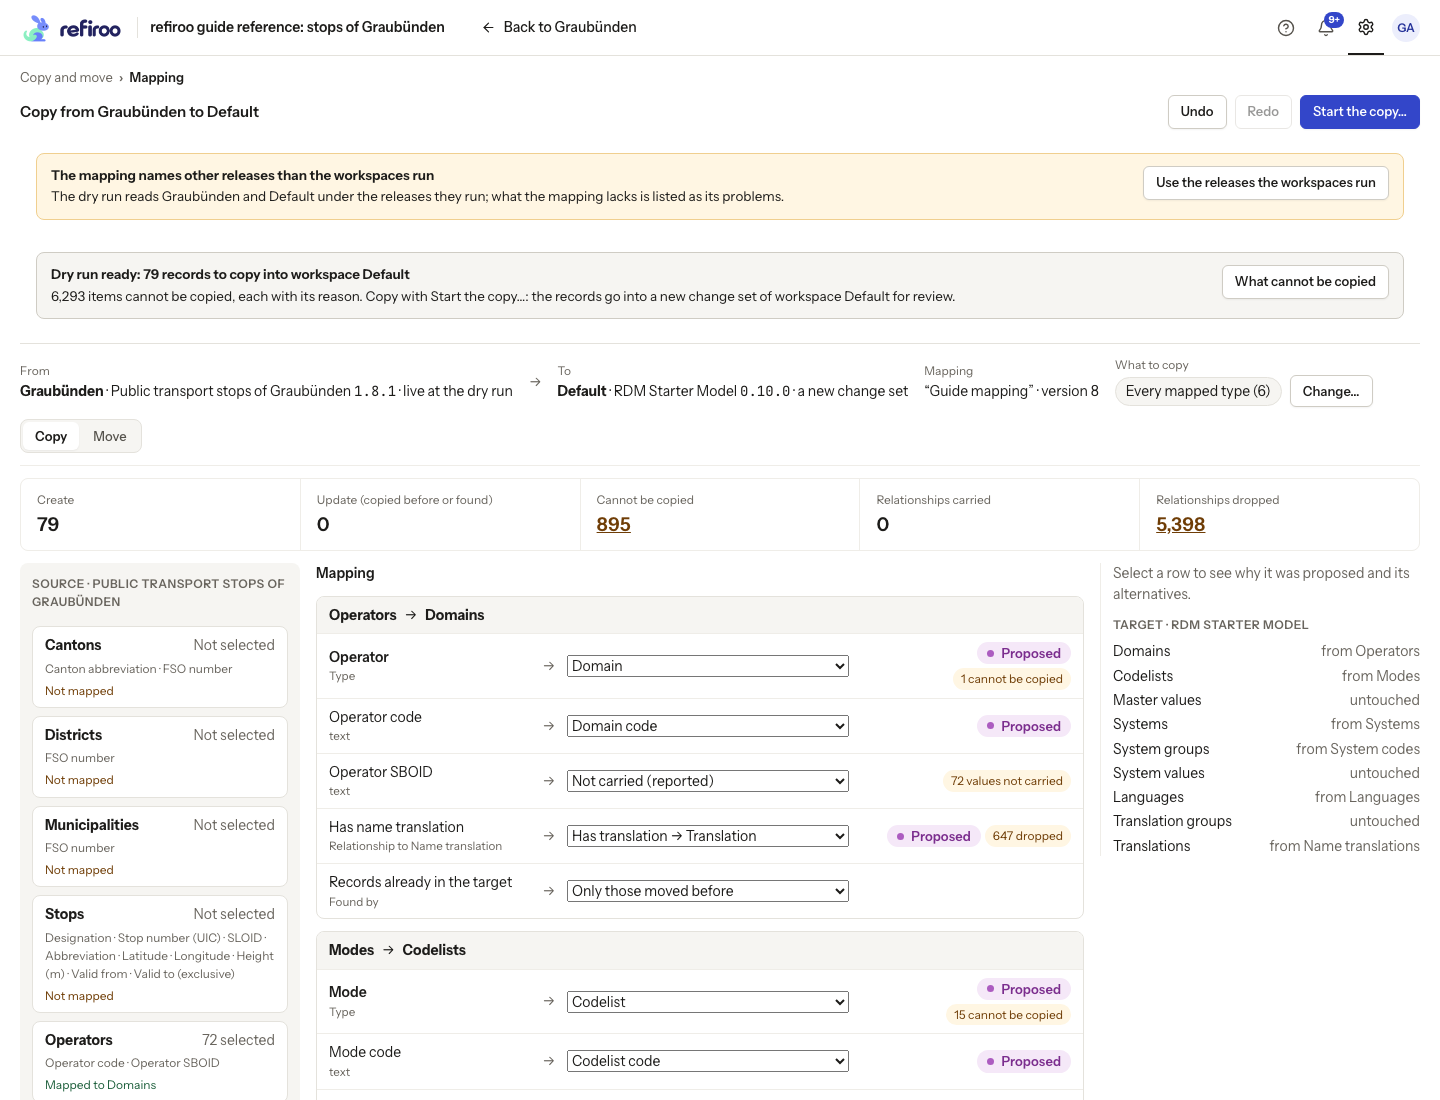
Above: the proposed Operators-to-Domains and Modes-to-Codelists choices need human review. The dry run exposes substantial omissions; this is not a loss-free copy.
Choose the records and inspect the dry run
Section titled “Choose the records and inspect the dry run”- Choose Copy to keep source records, or Move to prepare their later deletion too.
- Beside What to copy or What to move, choose Change…. Select Every mapped type, The whole workspace, Chosen types, or One record and everything under it. For chosen types, select the types and filters. For a subtree, choose its type and starting record.
- Choose Dry run this selection and wait for the result. Check the source, target, mapping version and selection shown above the figures.
- Review Create, Update, records that cannot go, and relationships carried or dropped. Open What cannot be copied or What cannot move to see reasons, counts and every affected item. Use an item’s Open the mapping link to correct its choice, then check again.
- Account for lost values too. A record may be copied without an unmapped value. Do not confirm merely because some records can go; resolve or deliberately accept each omission in scope.
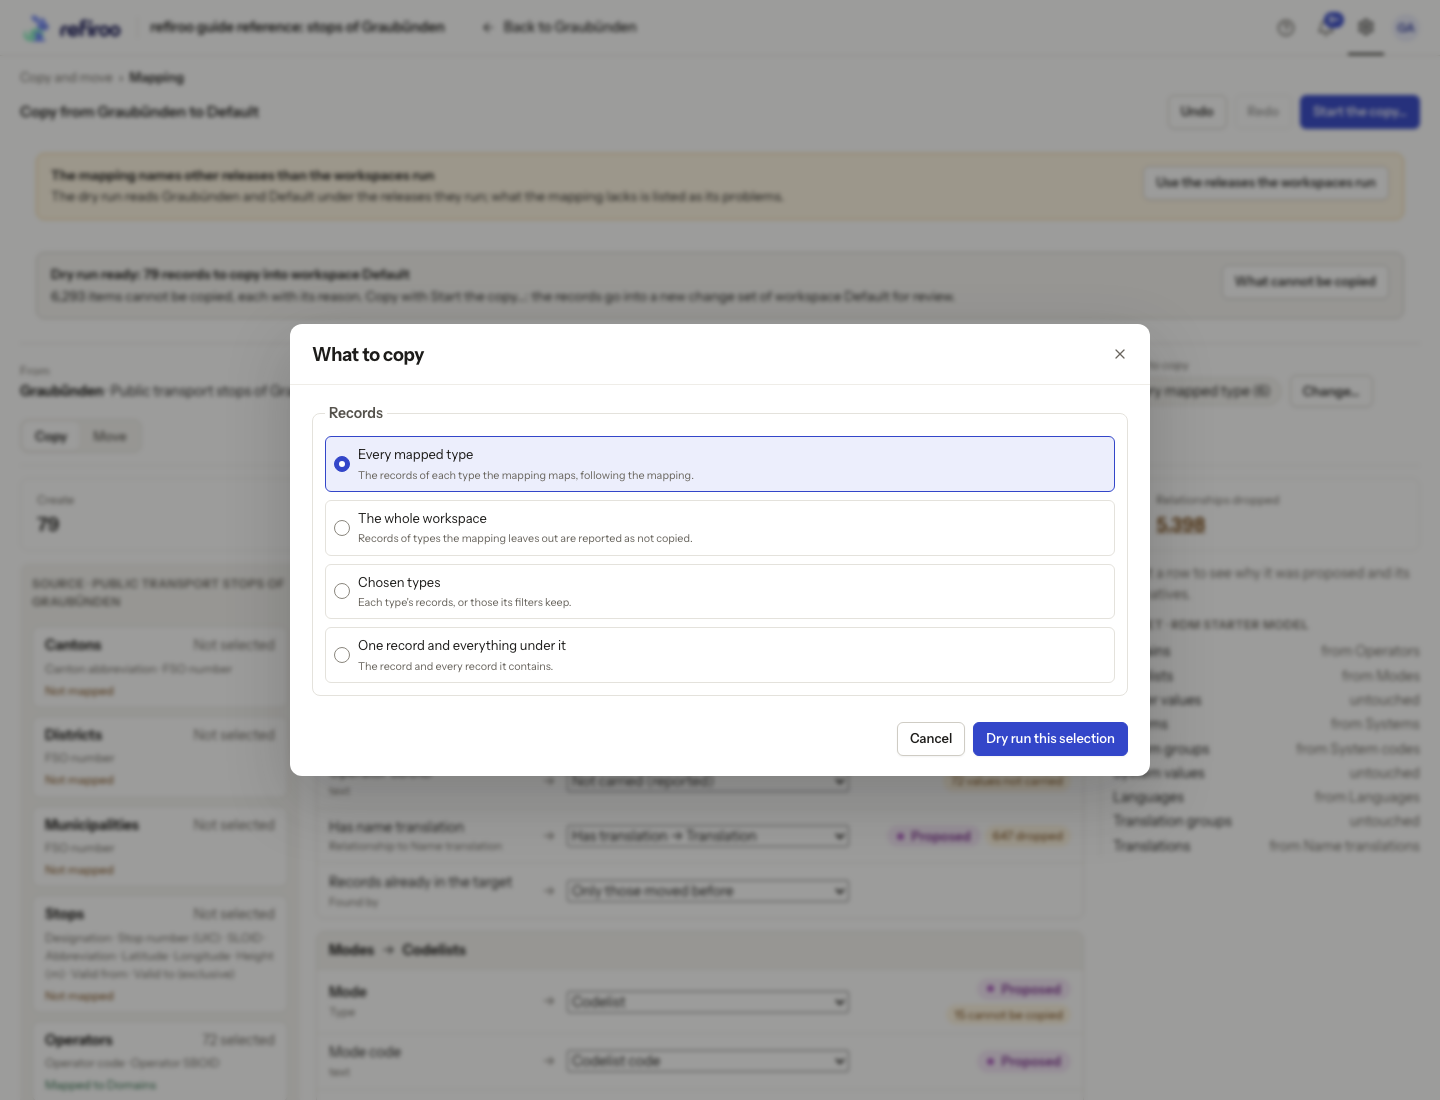
Above: Every mapped type is selected for Guide mapping. The captured selection dialog was cancelled.
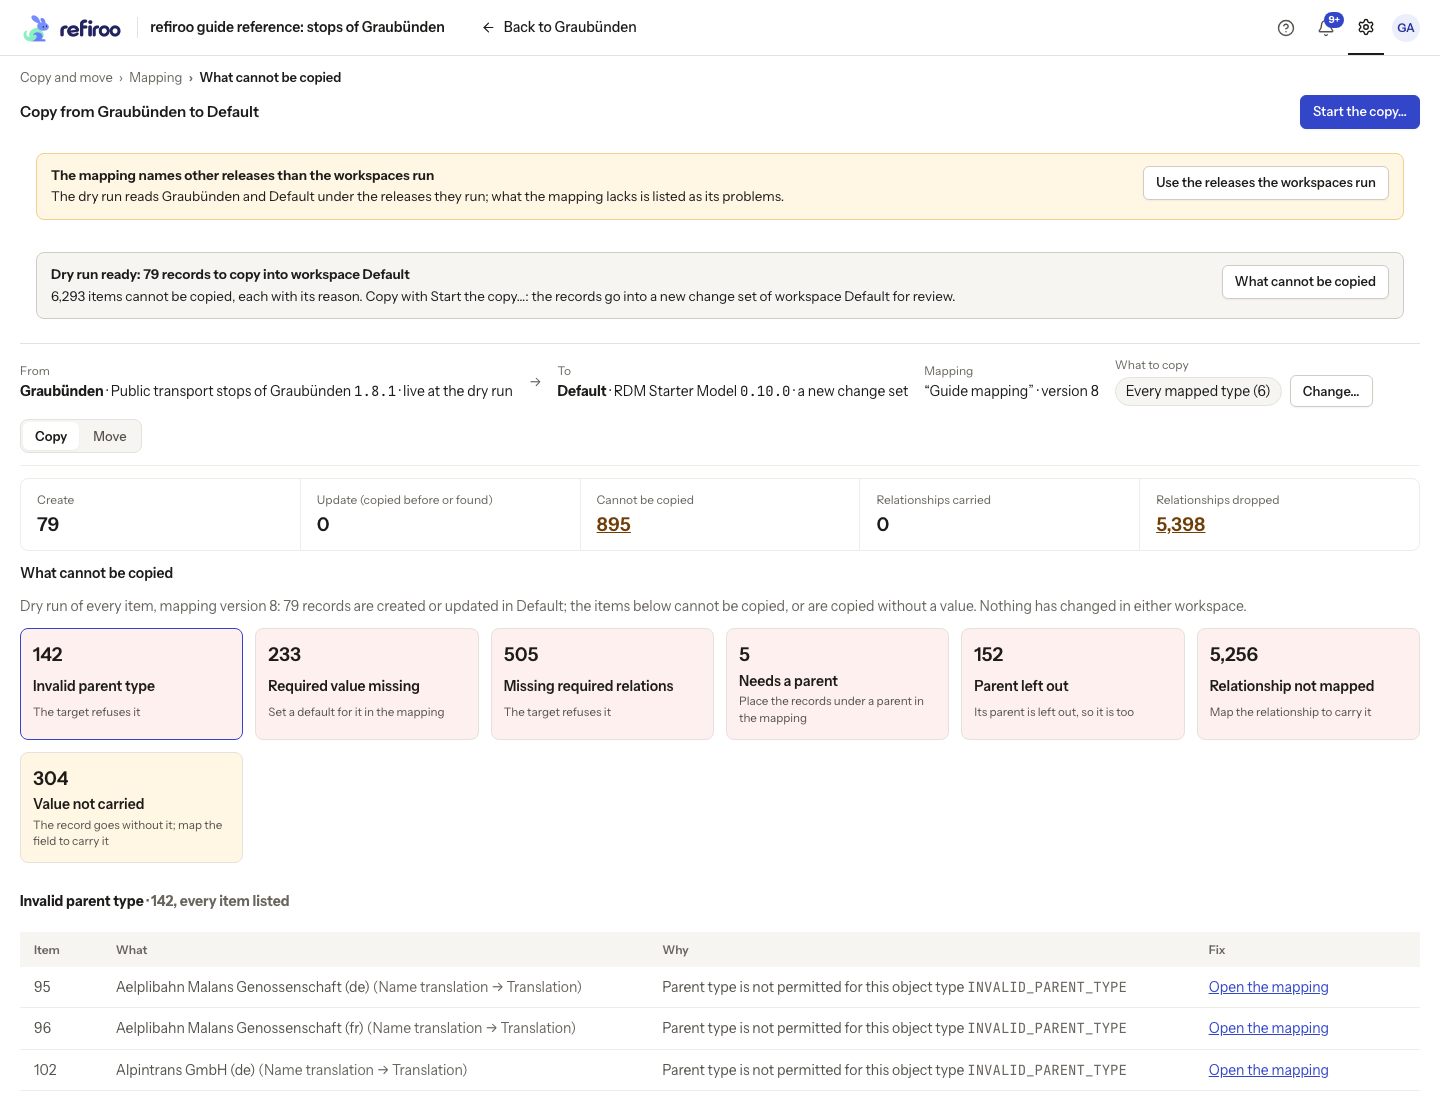
Above: the example predicts 79 creates and lists missing values, invalid parents and dropped relationships. Nothing has changed in either workspace.
Start and review the change sets
Section titled “Start and review the change sets”- Choose Start the copy… or Start the move…. Read the confirmation’s creates, updates, relationships and omissions, then fill Name of the change set of workspace for the target.
- Confirm Start the copy or Start the move. Wait for the operation’s result and inspect its actual counts and refusals. A changed mapping or model can prevent the start; refresh and review a new dry run before retrying. Nothing eligible to copy or move also prevents confirmation.
- Open the target’s produced change set. Review records, values and relationships, correct any remaining problems, validate, and publish through the normal approval process. Starting the copy alone has not made its records live.
- For Move, also open the source deletion change set. Publish the target copy first, then review and publish the source deletions separately. Check any records kept because they changed since the dry run or because records staying behind depend on them. Do not assume every selected source record was deleted.
Follow Prepare and publish a change set for review, validation and publication. Publishing either change set needs its own permissions and any approvals required in that workspace.
Use Mapping, Source, Target and Not copied or Not moved to inspect the editor’s parts. Read the selected row’s Why this step; evidence and alternatives explain a proposal, without a numeric score. If a warning says the mapping names other releases, choose Use the releases the workspaces run, review its rows and obtain a new dry run. Read-only notices mean the deployment does not allow this flow; ask the operator before attempting a start.
Follow the started job to its result, inspect actual counts and any refusals, and open its produced change sets. A finished job is not proof that every source item was copied or removed.