Approve a change set
Use this task when a proposal needs someone else’s decision. You need Approve publications to decide a request. A workspace can require a second person, even if the submitter holds that permission. See Inbox and approvals for the policy and notices.
Submit your work
Section titled “Submit your work”- Prepare the change set, then check its workspace in the sidebar and name in the band. Open Details for its version. Review the proposed records and relationships.
- Choose Submit for publication where offered. The dialog explains that refiroo validates the change set and that it cannot be edited while it waits. Add a comment if the approver needs context, then choose Submit. Cancel leaves it unsubmitted.
- If validation fails, fix the reported problems and submit again. Success says Submitted for publication. It waits for approval. The approvers receive a notice.
- Check that the band now says waits for approval. Open Details for the submitted version and your name; read your comment in the review’s Decision panel. To change your proposal while it waits, choose Withdraw request first. The proposed work stays in the change set and becomes editable. After correction, submit a new request.
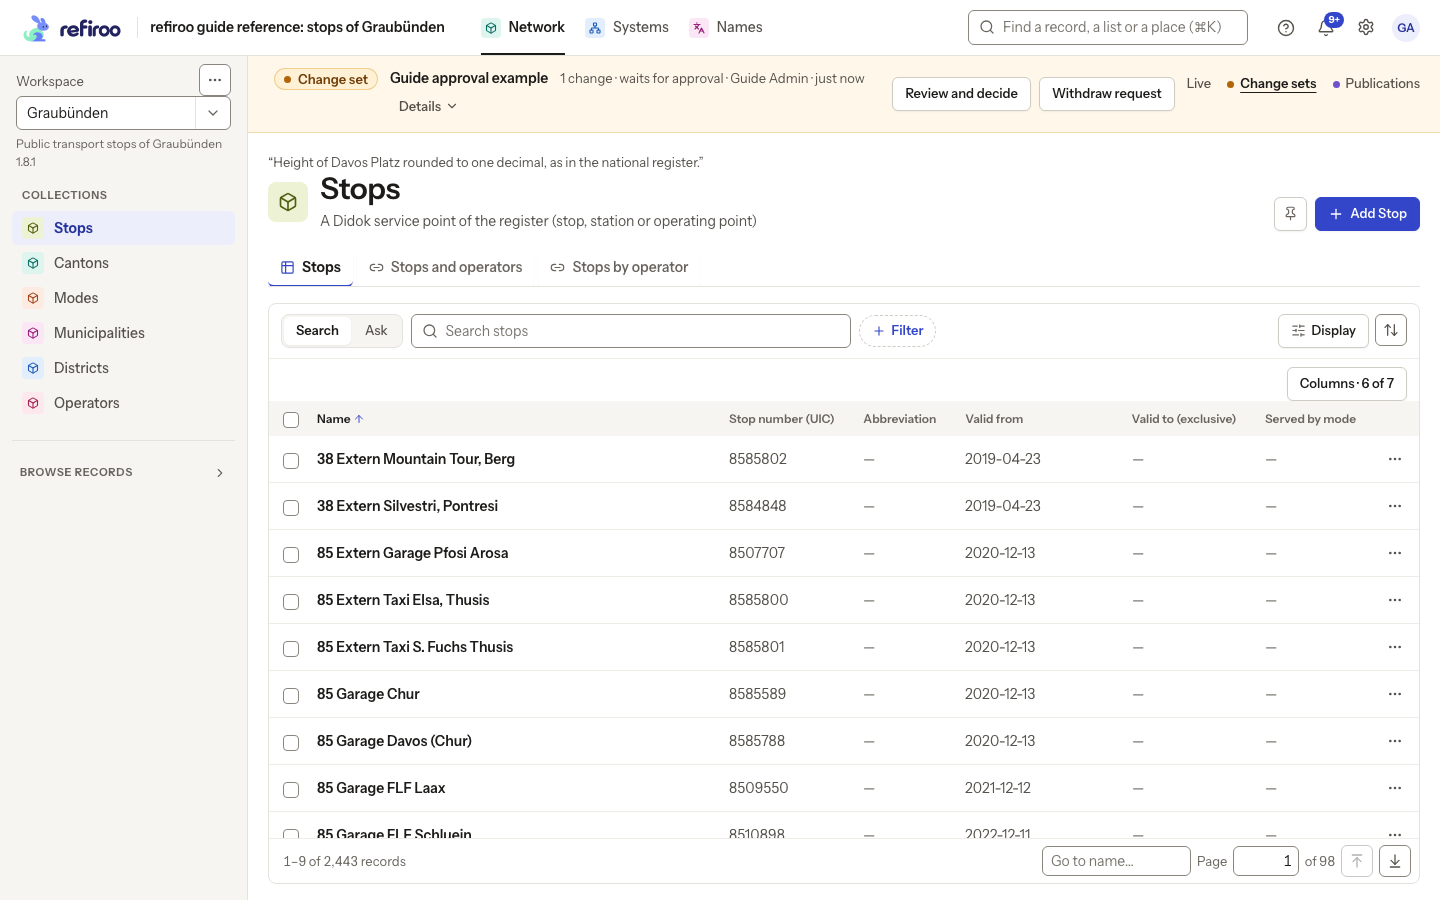
Above: Guide approval example waits for approval in Graubünden. The banner offers Review and decide and Withdraw request; its one proposed change is still separate from Live.
If Publish is offered instead, your permissions and the policy allow direct publication. Use the publish steps. Do not change workspace policy merely to make a button appear; ask an administrator if the available actions do not match your responsibility.
Open and review a request
Section titled “Open and review a request”- Open the bell and choose Waiting for your approval, or open the request from Home’s Waiting for your approval section using Review. The Home list shows the change-set name, workspace, submitter and submission time, newest first. You can also open a submitted change set and choose Review and decide.
- Check the workspace, change-set name, submitted version, submitter and their comment. Review all proposed changes, not just the first visible record.
- On Records, expand changed entries to inspect before and after values. Review created and deleted records as well. On Relationships, inspect added, changed and removed connections.
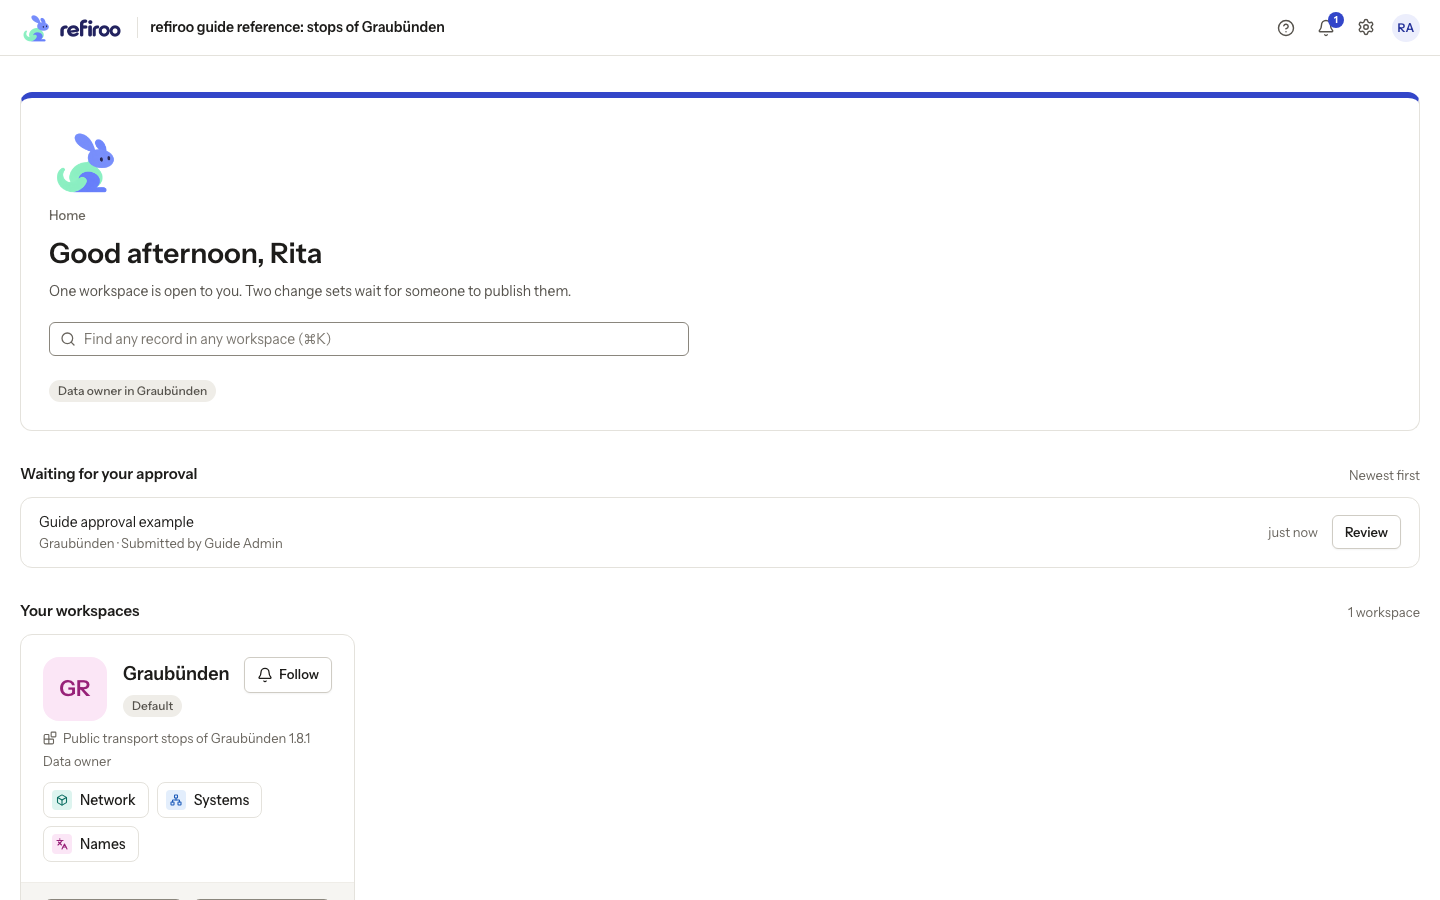
Above: Fictional approver Rita Approver has Data owner access in Graubünden. Guide Admin’s request appears under Waiting for your approval, above her workspace card.
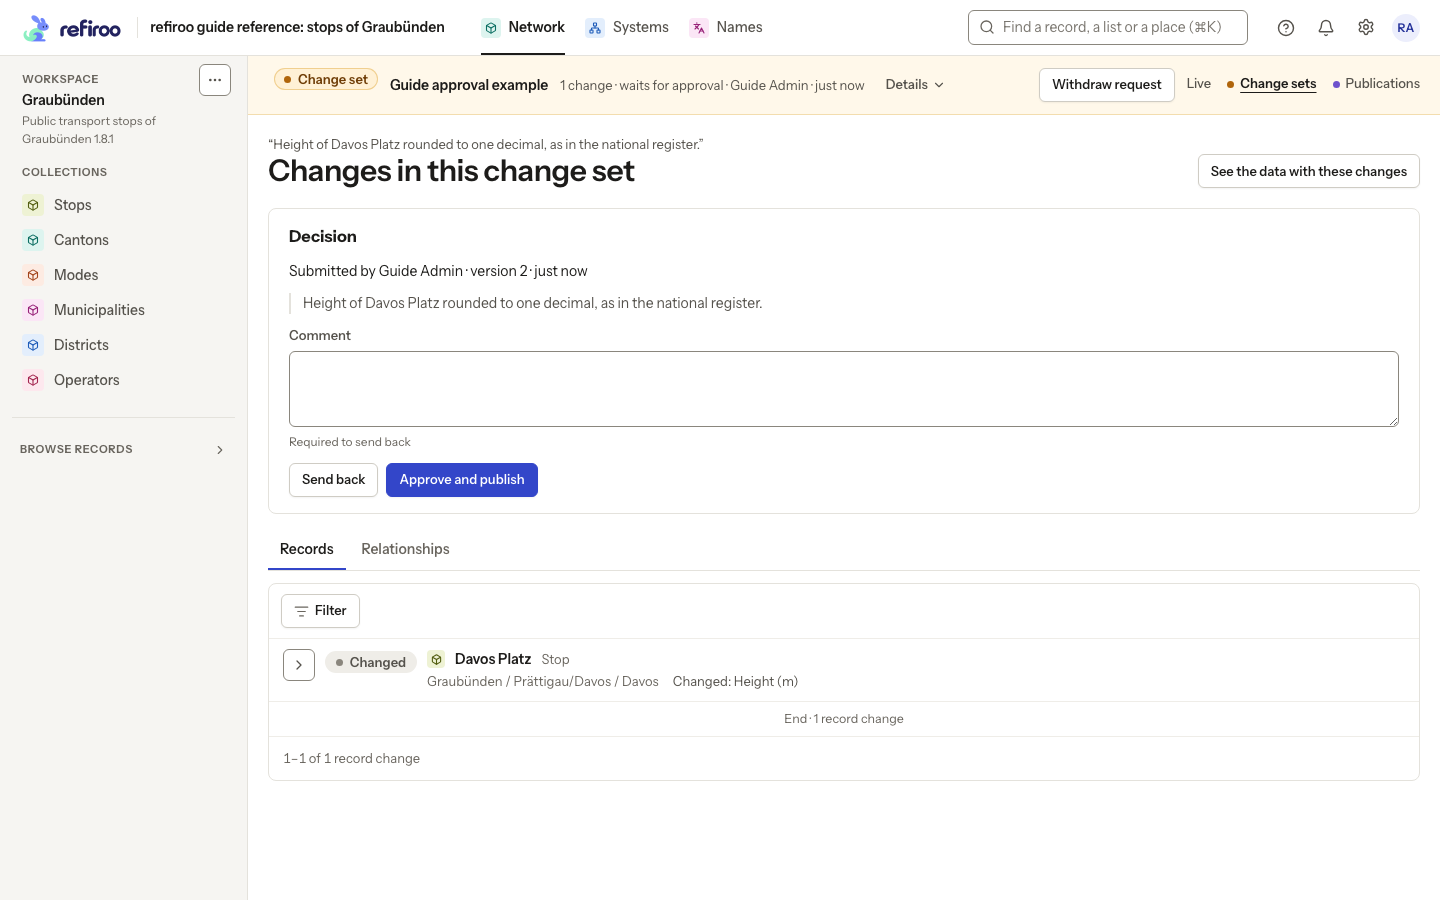
Above: Rita sees who submitted version 2, when it was submitted and the comment about Davos Platz’s height. Expand the record below the panel to inspect the correction before deciding.
If you open your own request while a second person is required, there is no Decision panel. The review says A second person must decide this request. You can read the changes, but another authorised approver must decide.
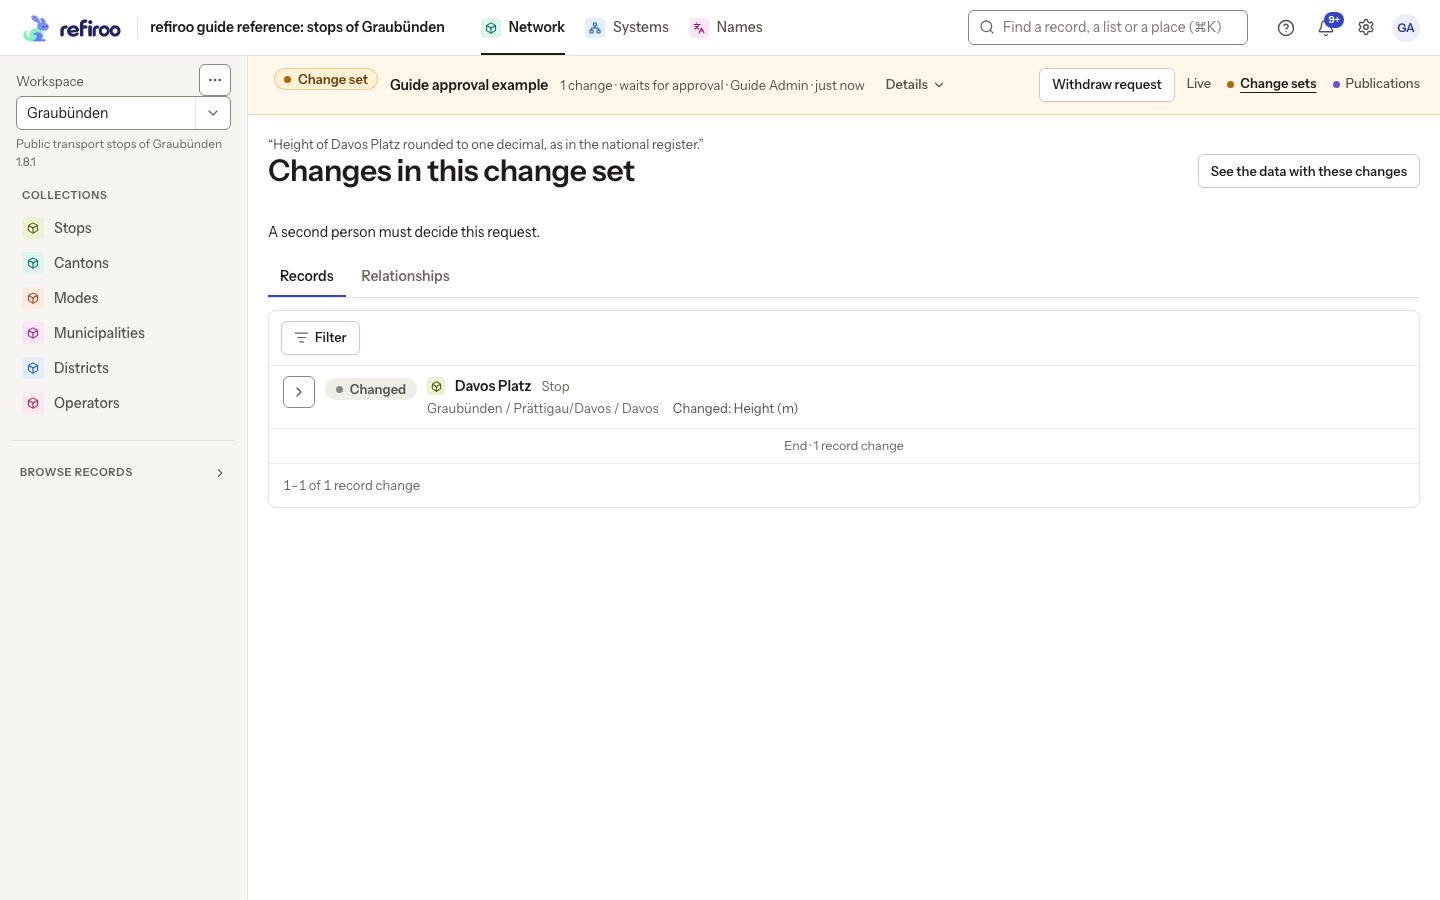
Above: Guide Admin can inspect the Davos Platz change but cannot approve this request themselves.
Decide
Section titled “Decide”- Read Decision and confirm it names the version you reviewed. If the screen says the proposal changed since submission, choose Reload and inspect its current state. Do not decide an older version as though it were the current proposal.
- To accept it, add an optional Comment and choose Approve and publish. This immediately attempts publication. On success, the change set is consumed, Live contains its authored changes and a new publication holds the result. The submitter is notified.
- To request corrections, enter a Comment saying what needs attention and choose Send back. A blank comment is refused. Success returns the change set to its submitter for editing and another submission, without publishing it.
- If publication reports a conflict or validation failure, read the reason and refresh the review. Have the proposal corrected and resubmitted where necessary. A refused decision is not a successful publication.
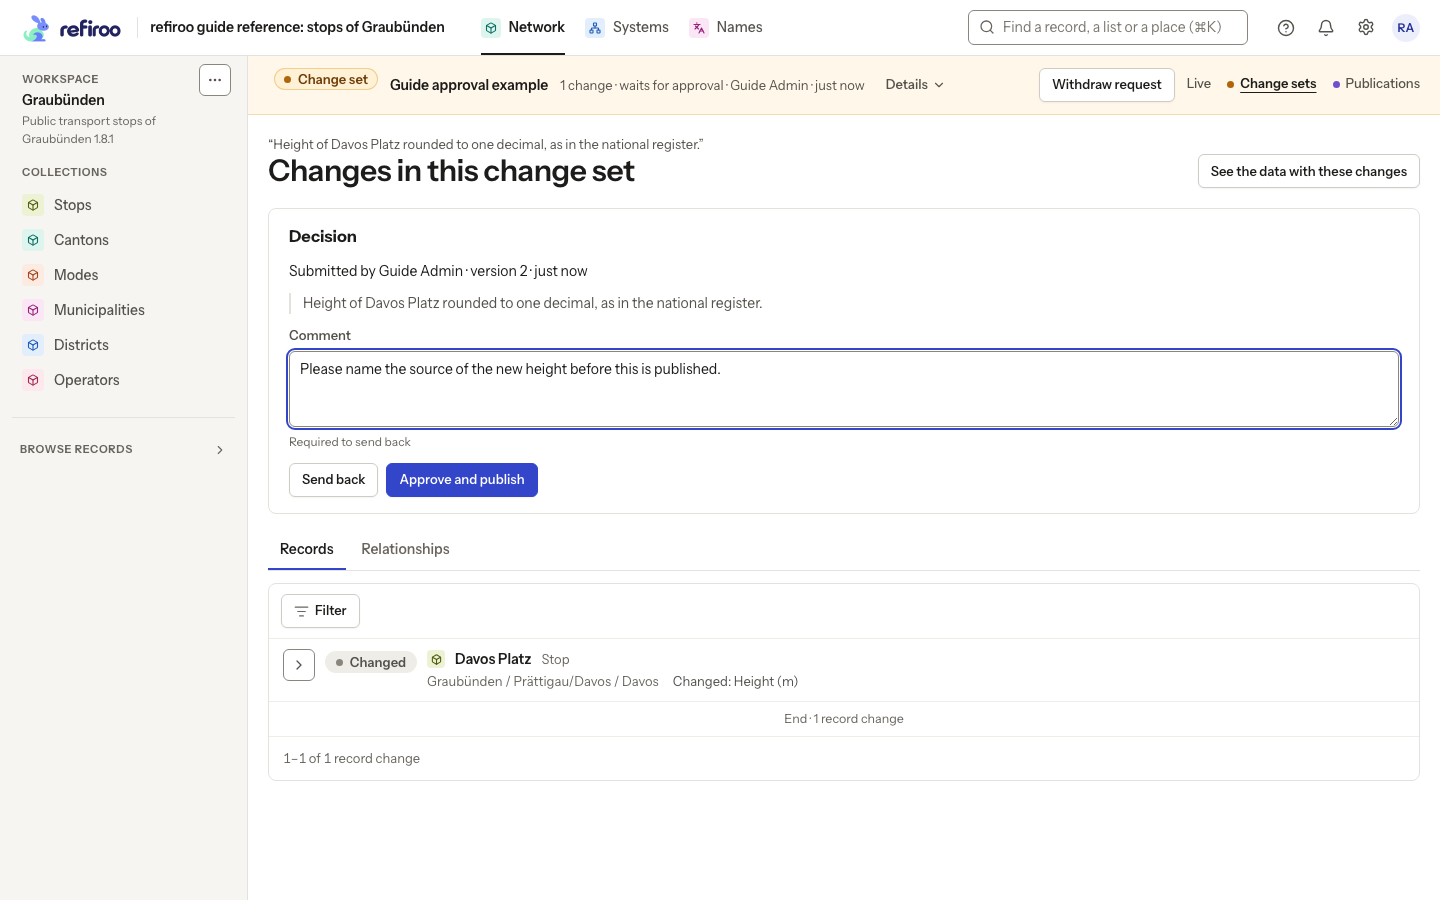
Above: Rita asks for the source of the new height. The reason is entered, but Send back has not yet been pressed.
If the request was withdrawn or already decided, reload to see its new state.
Correct work that was sent back
Section titled “Correct work that was sent back”- Open the returned change set from your notice or the change-set list. The notice says Sent back and names the request; its detail includes the reason and approver.
- Read the reason in the notice below the change-set band. The request is no longer waiting and the change set is editable again. From Changes in this change set, choose See the data with these changes to inspect and correct the affected records and relationships.
- Review the whole result, then choose Submit for publication again. In Comment (optional), explain what you corrected or add the context the approver requested. Choose Submit. The change set is validated again and waits for a new decision. Cancel leaves it editable.
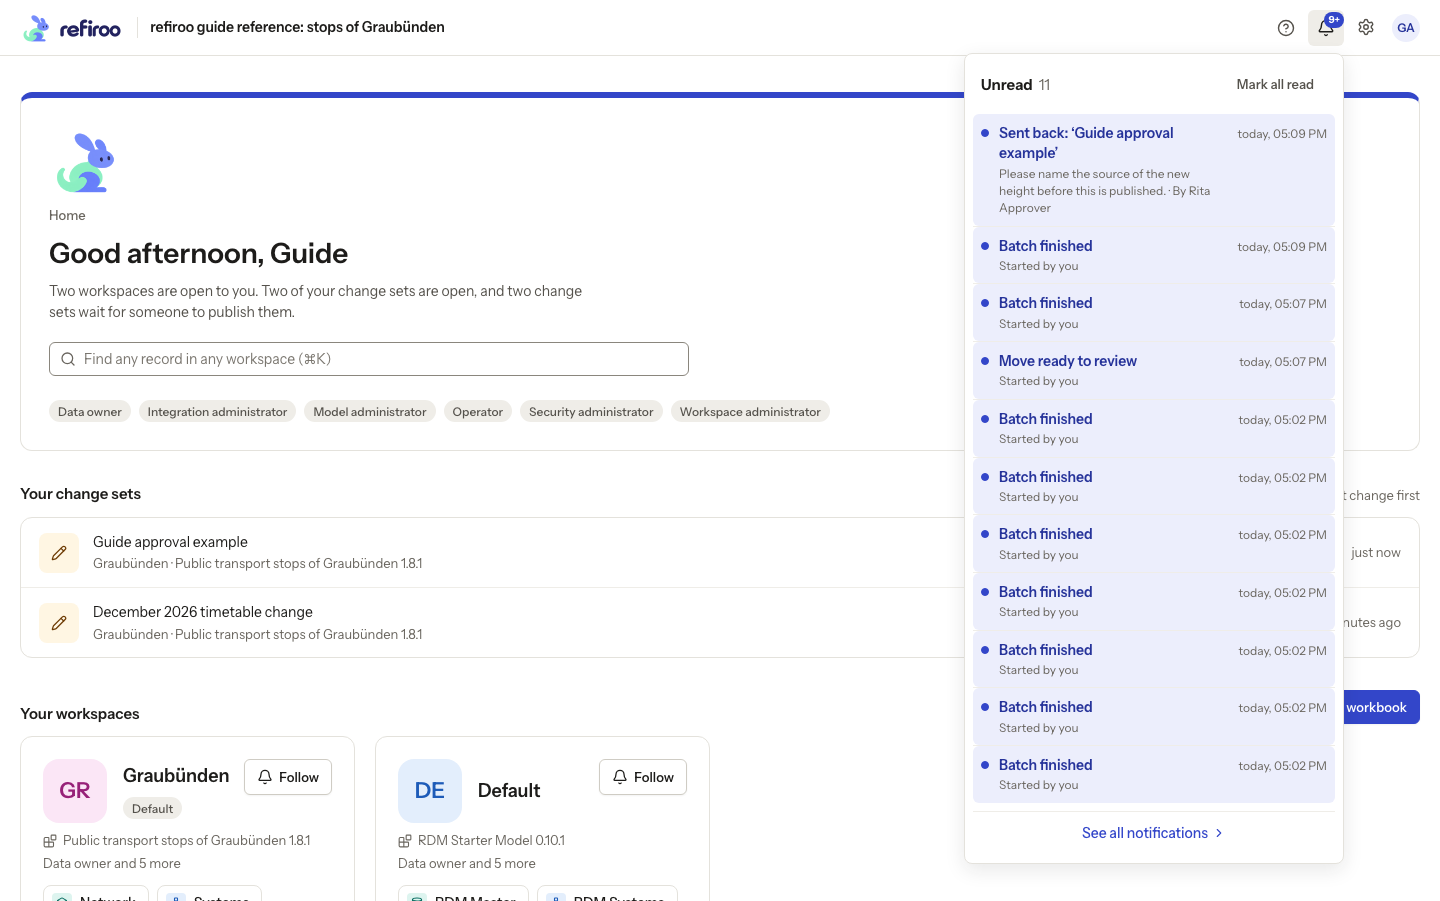
Above: Guide Admin’s newest notice carries Rita’s request for a source.
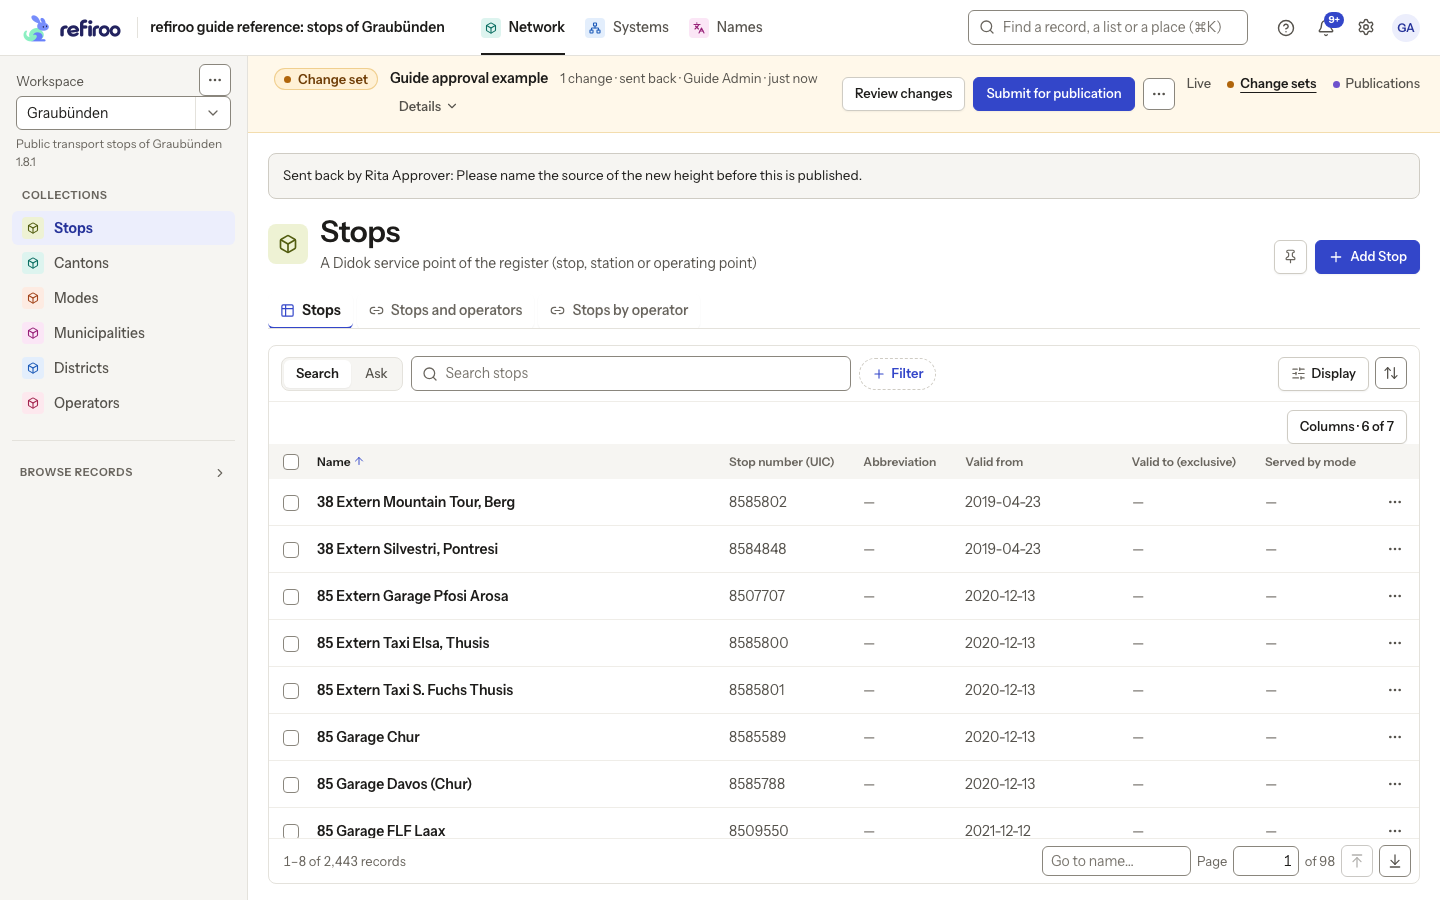
Above: Guide approval example is open for correction. The banner shows Rita’s reason and offers Submit for publication again.
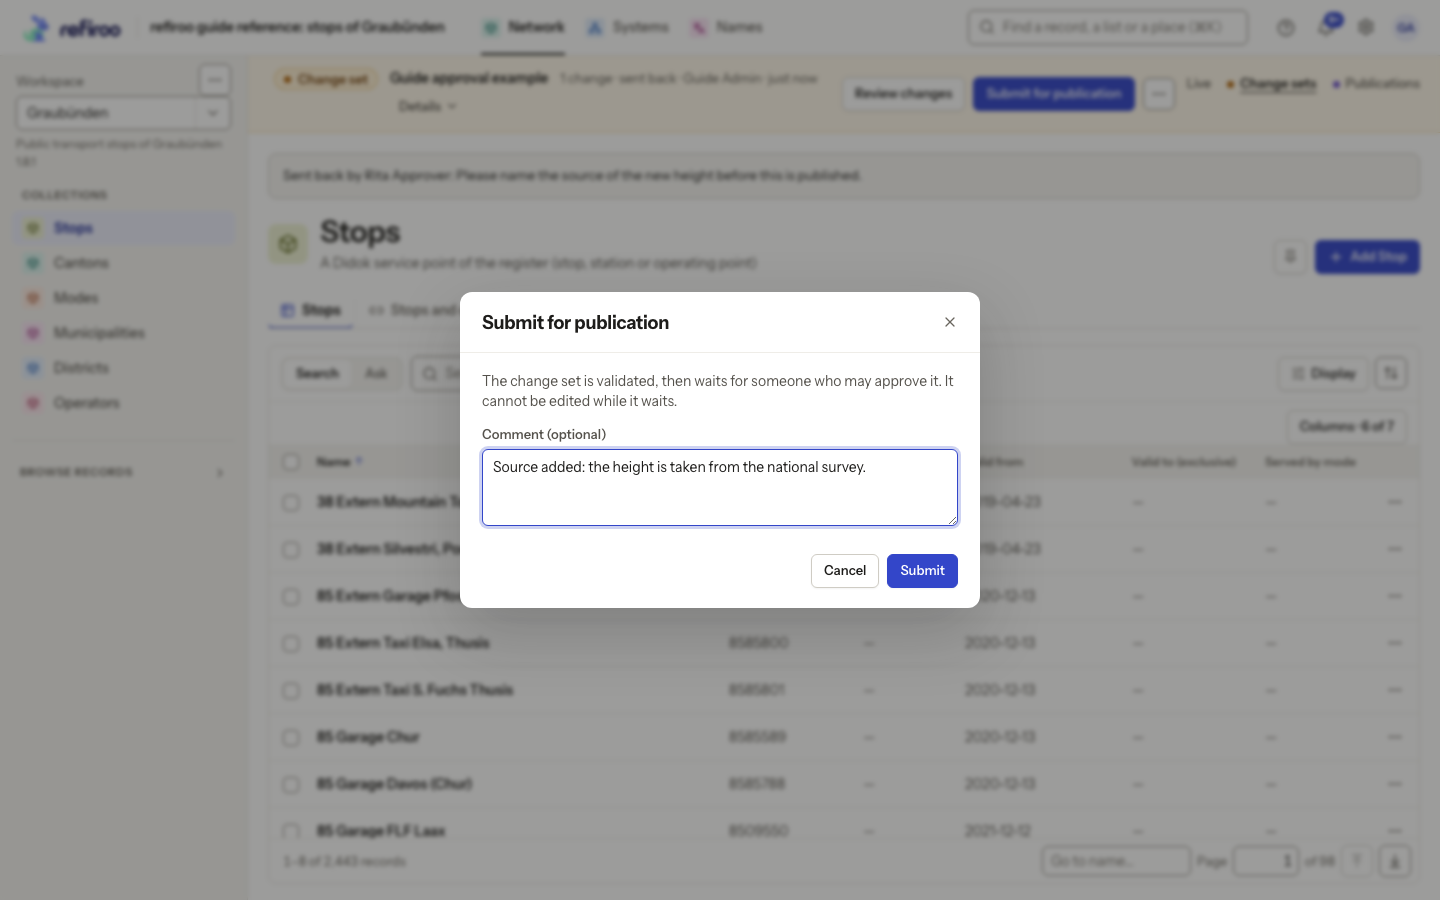
Above: Guide Admin adds the source of the height in a new submission comment. The dialog explains that the change set cannot be edited while it waits.
Approve the revised request and check the result
Section titled “Approve the revised request and check the result”- As the approver, open the new request from Home or the inbox. Read the current Decision details and the new submission comment. Review the records and relationships again; the earlier review does not approve later edits.
- If the proposal is ready, choose Approve and publish. Wait for success. If it is refused, resolve the reported conflict or invalid data as described under Decide.
- Open Publications in the application. The new publication is Current and names the approver as the person who published it. Choose Open publication to inspect the snapshot. Check the changed records in Live too.
- As the submitter, open the bell. The approval notice confirms the decision. Earlier notices can remain in the inbox; read the newest result rather than treating a previous send back as still pending.
- To trace the work, open Settings, Workspaces, select the workspace and choose Activity. Read the actions, people and times. See History for filtering.
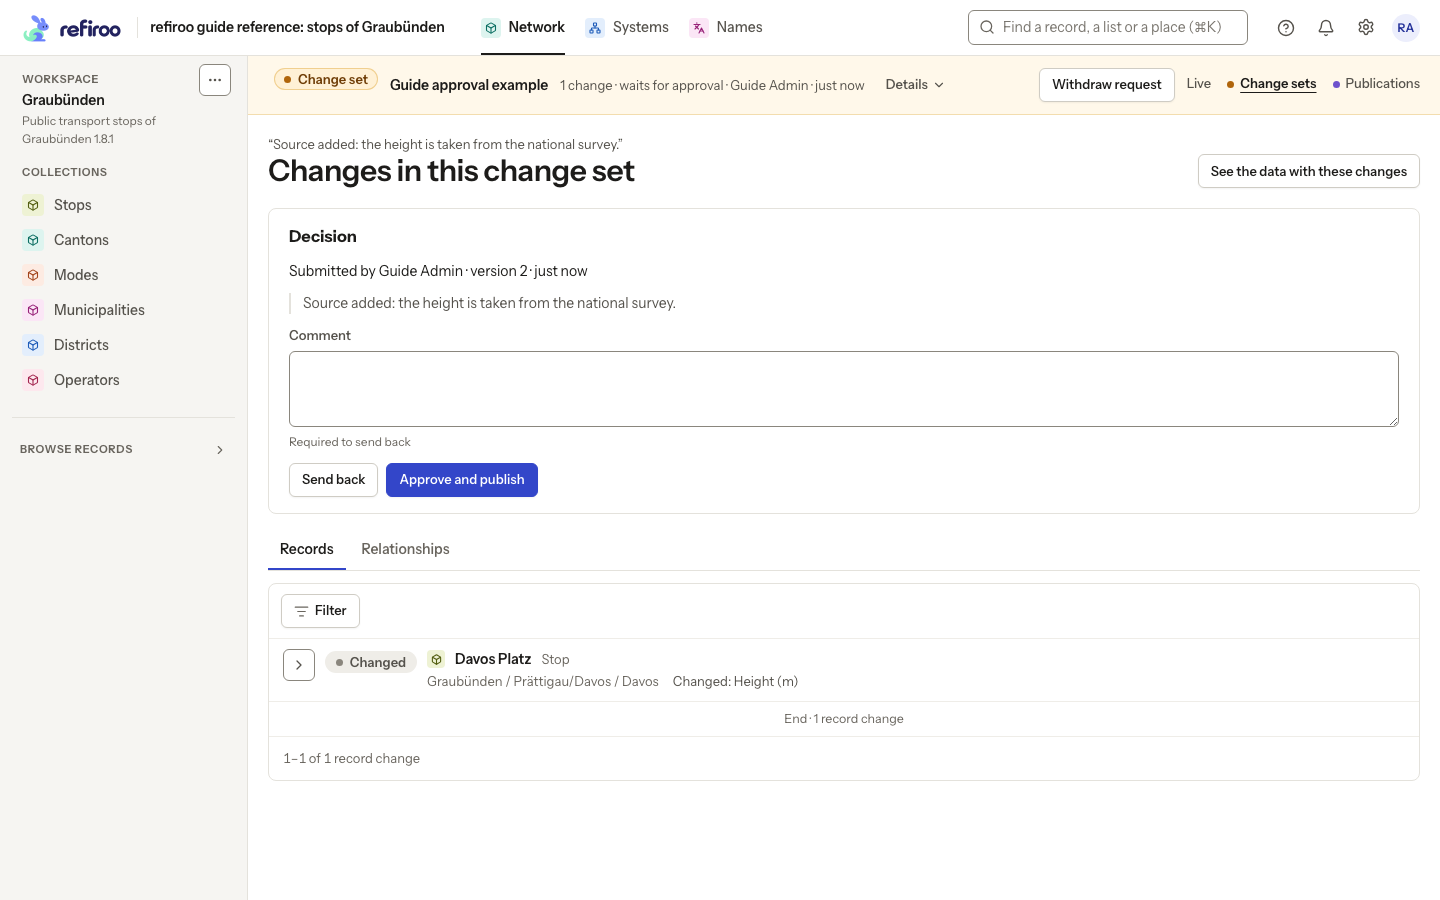
Above: Rita reviews the new source comment before choosing Approve and publish.
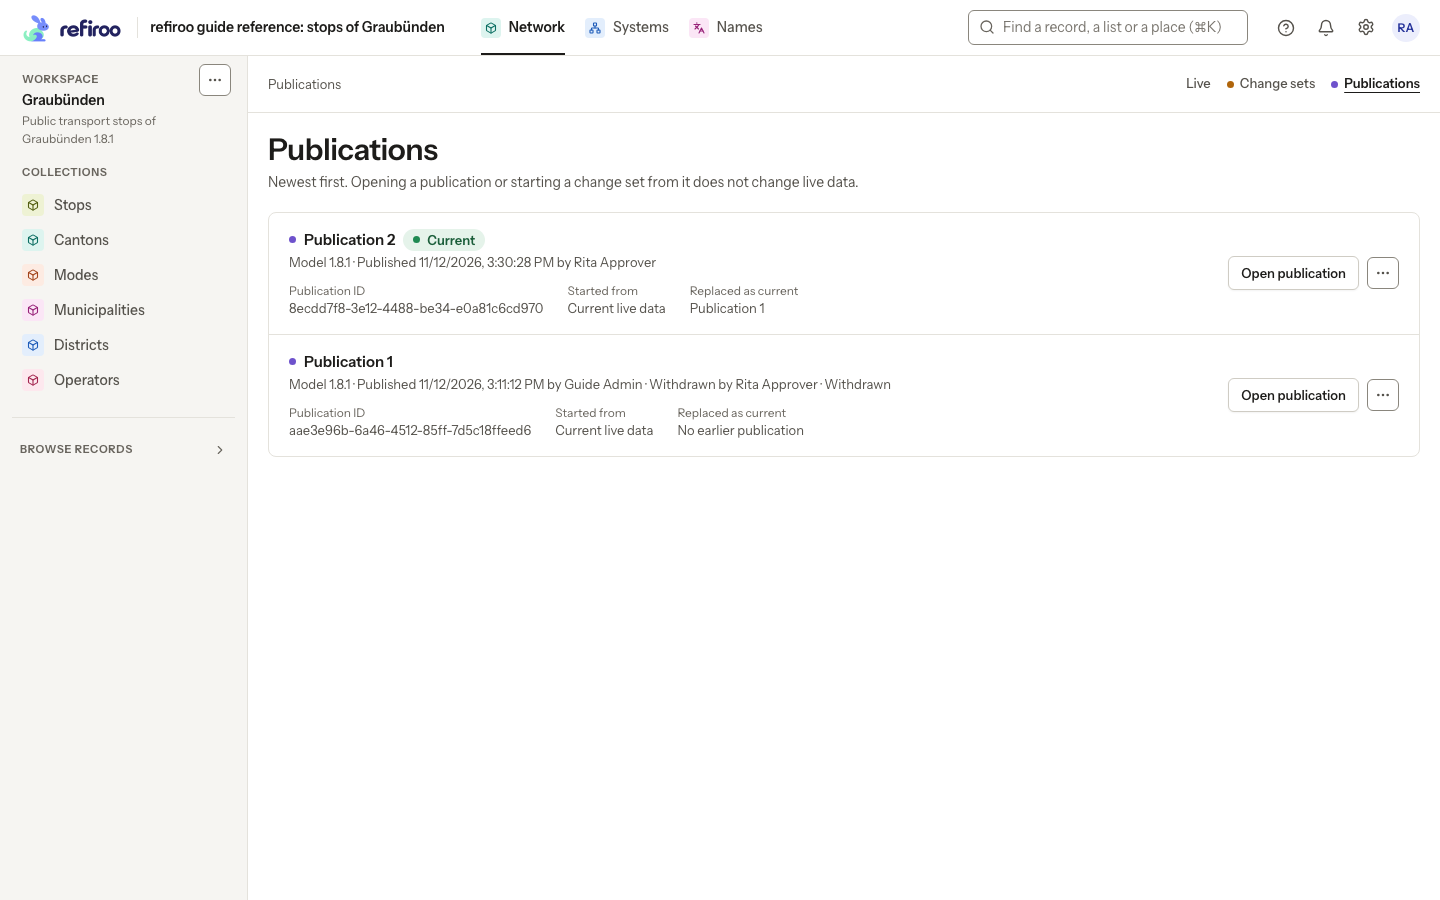
Above: Publication 2 in Graubünden is Current and was published by Rita. Publication 1 is no longer current; it is also marked Withdrawn in this example.
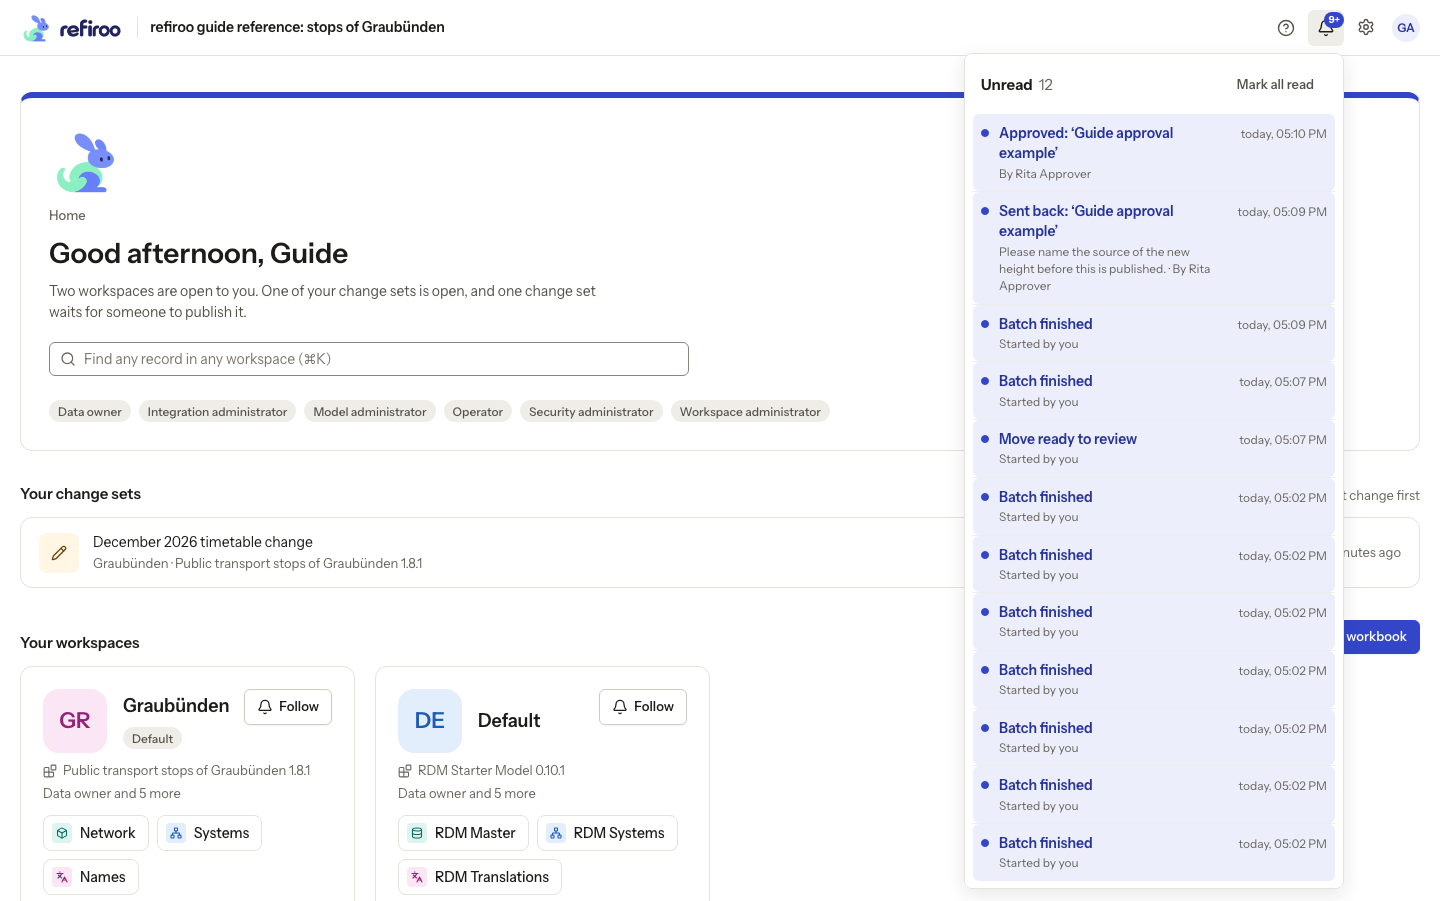
Above: Guide Admin receives the approval result above the earlier send-back notice.
Follow Browse a publication for inspecting the saved result.